Single Sign-On (SSO)
Administrators can configure a Single Sign-On provider for their organisation directly from the Phase Console, without needing to edit environment variables or restart the application. Each organisation can have one active OIDC provider at a time, and can optionally enforce SSO so that all members must sign in through it.
Configure a provider
-
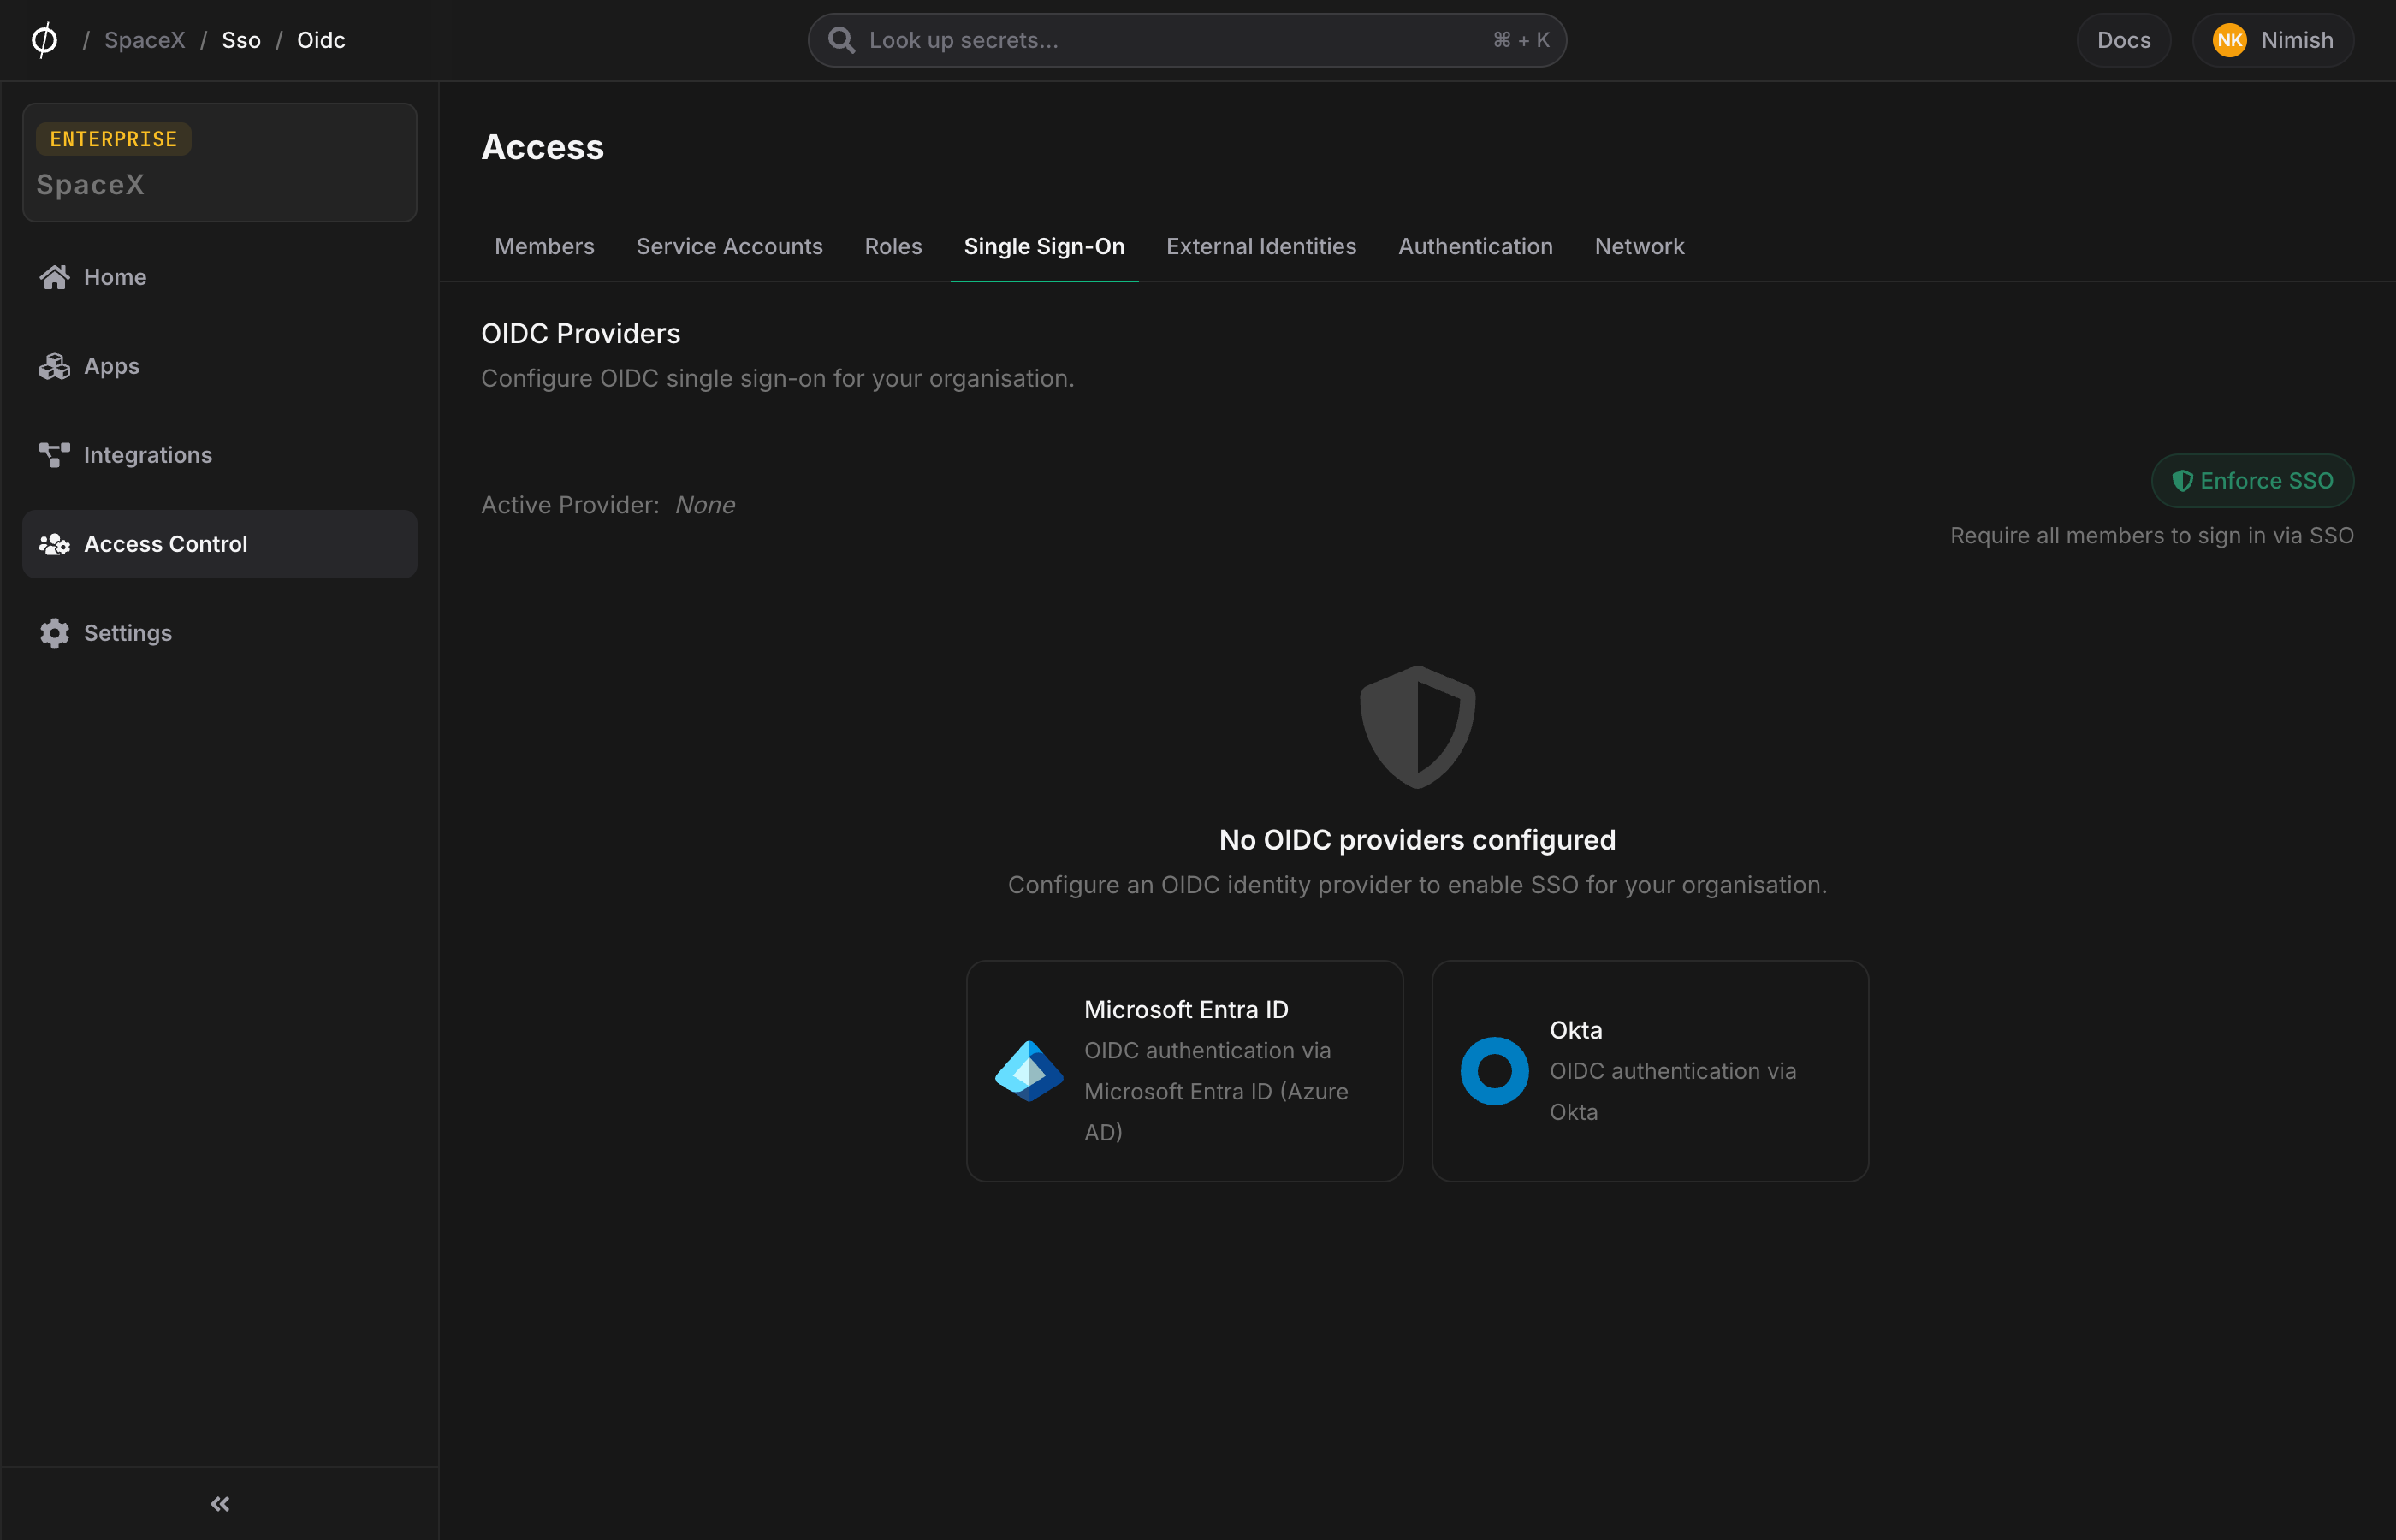
In the Console, go to Access → Single Sign-On.
-
Click the provider card for Microsoft Entra ID or Okta.
-
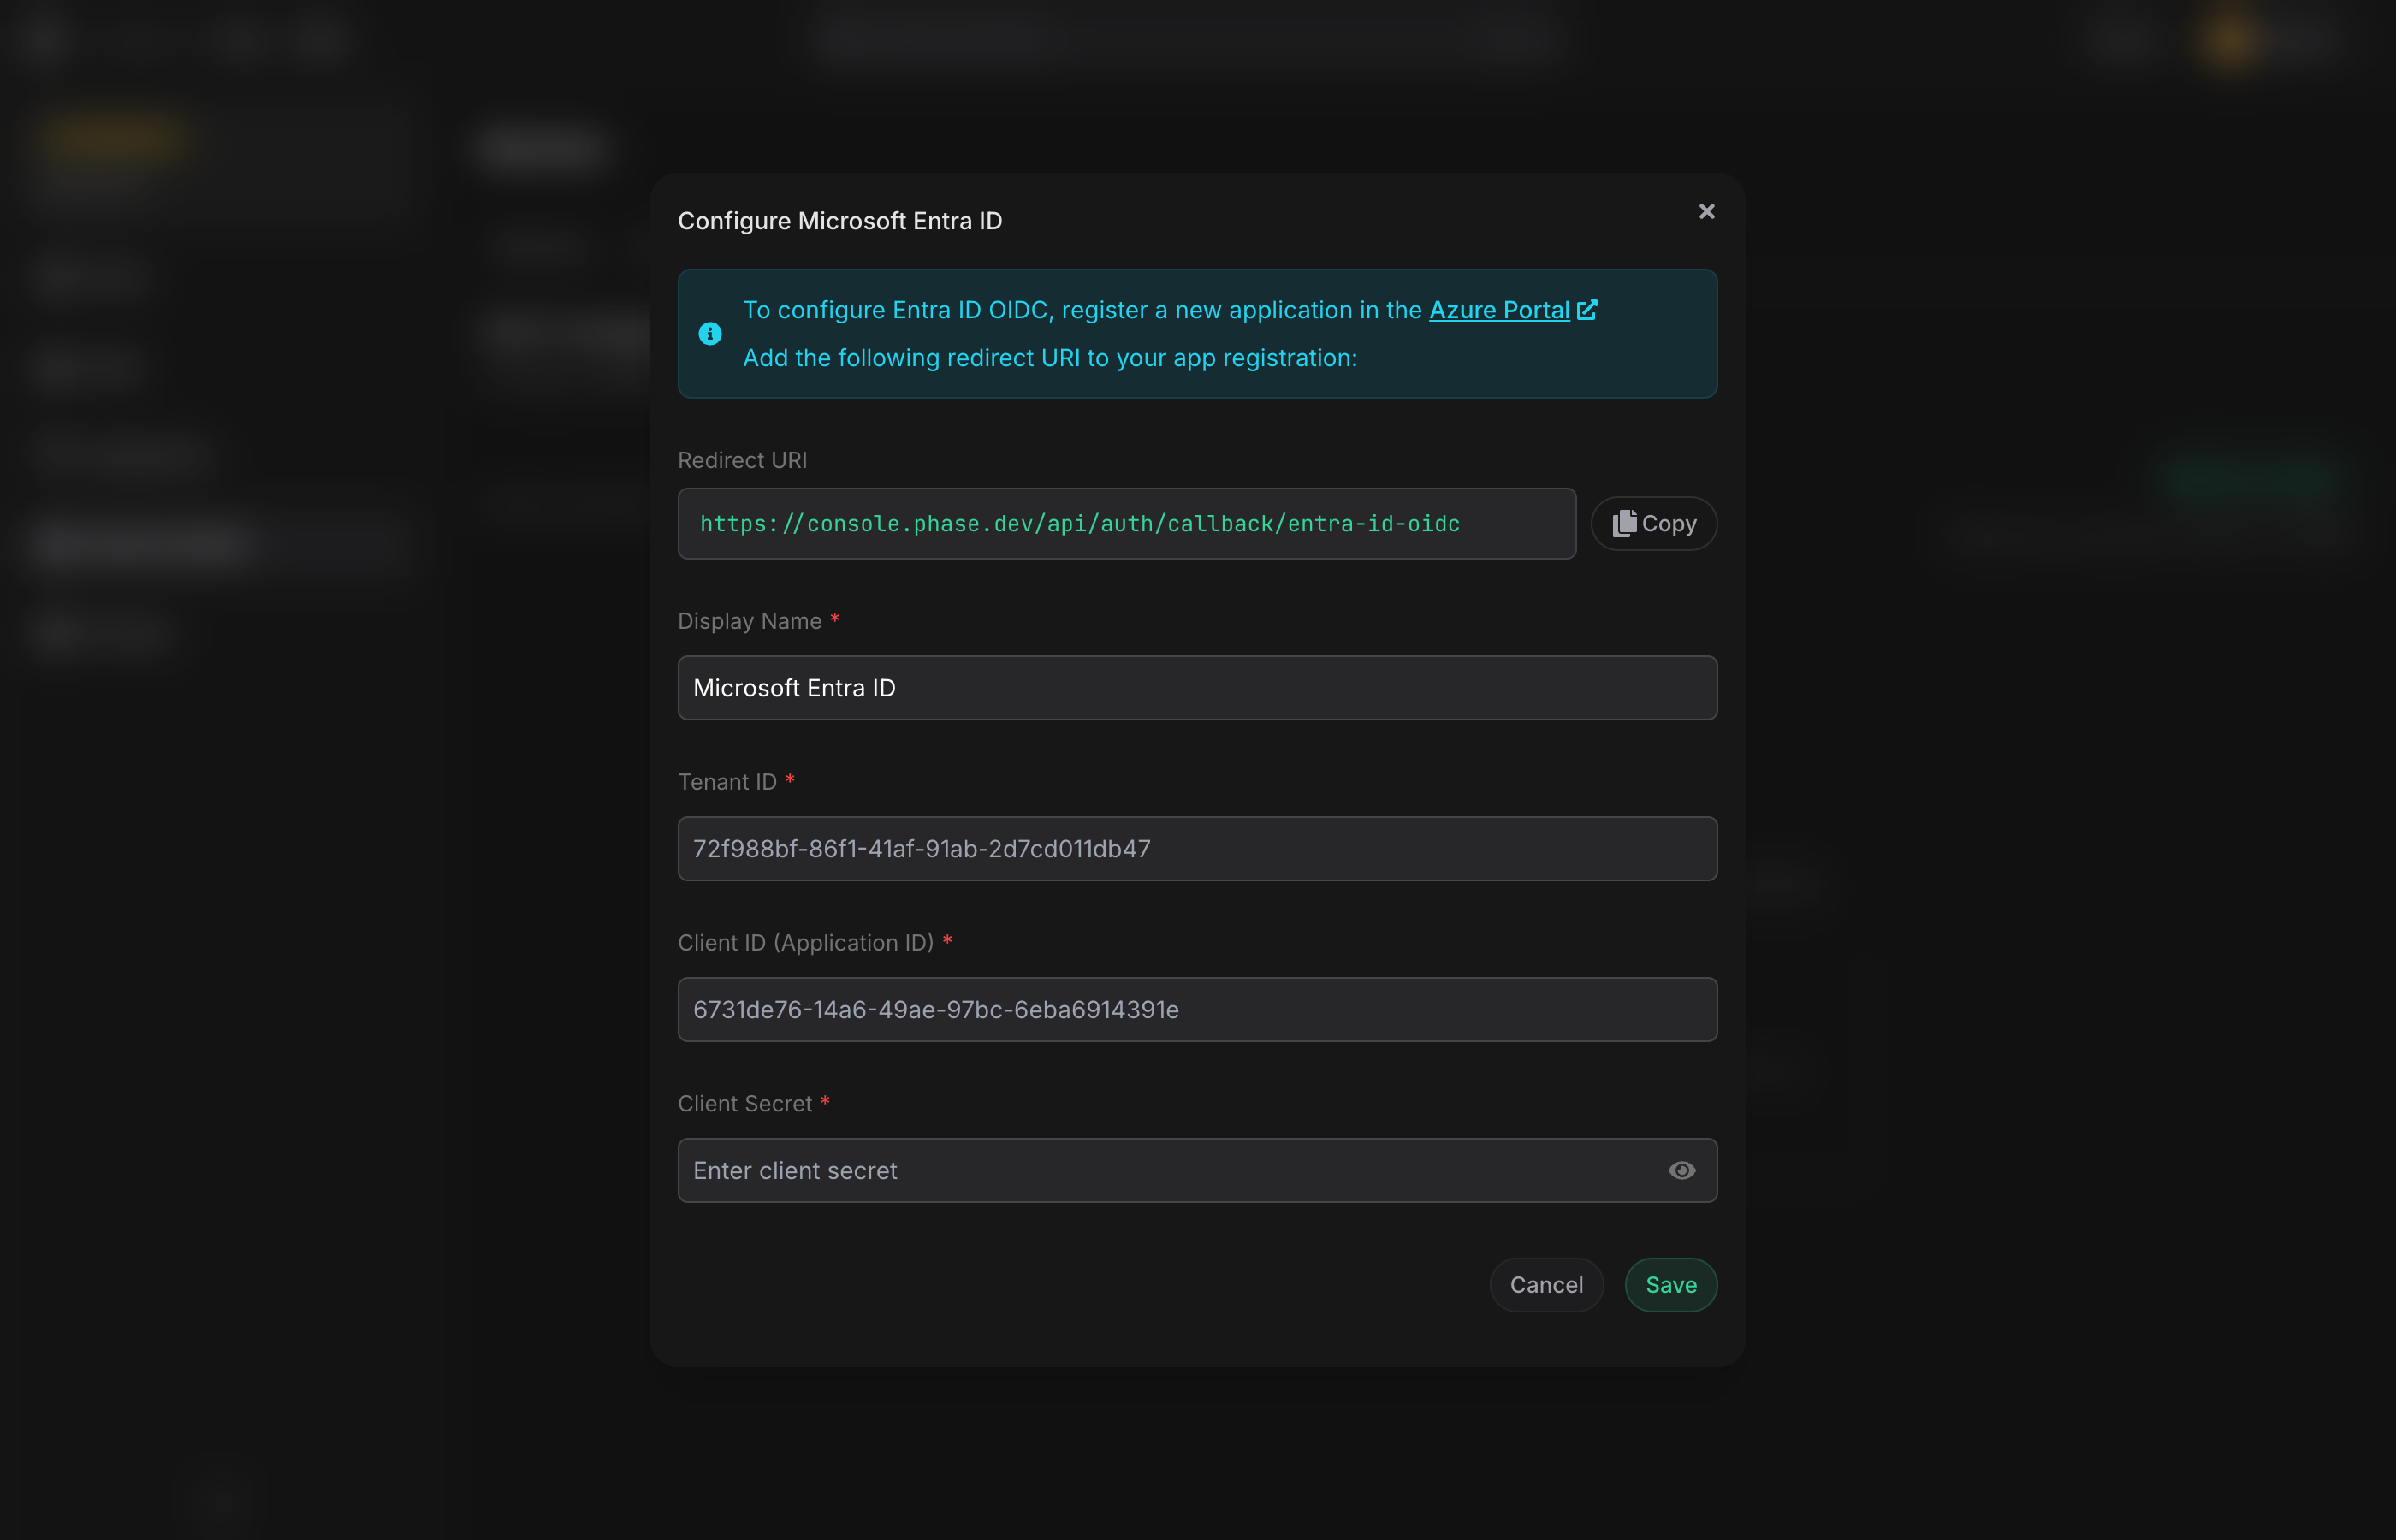
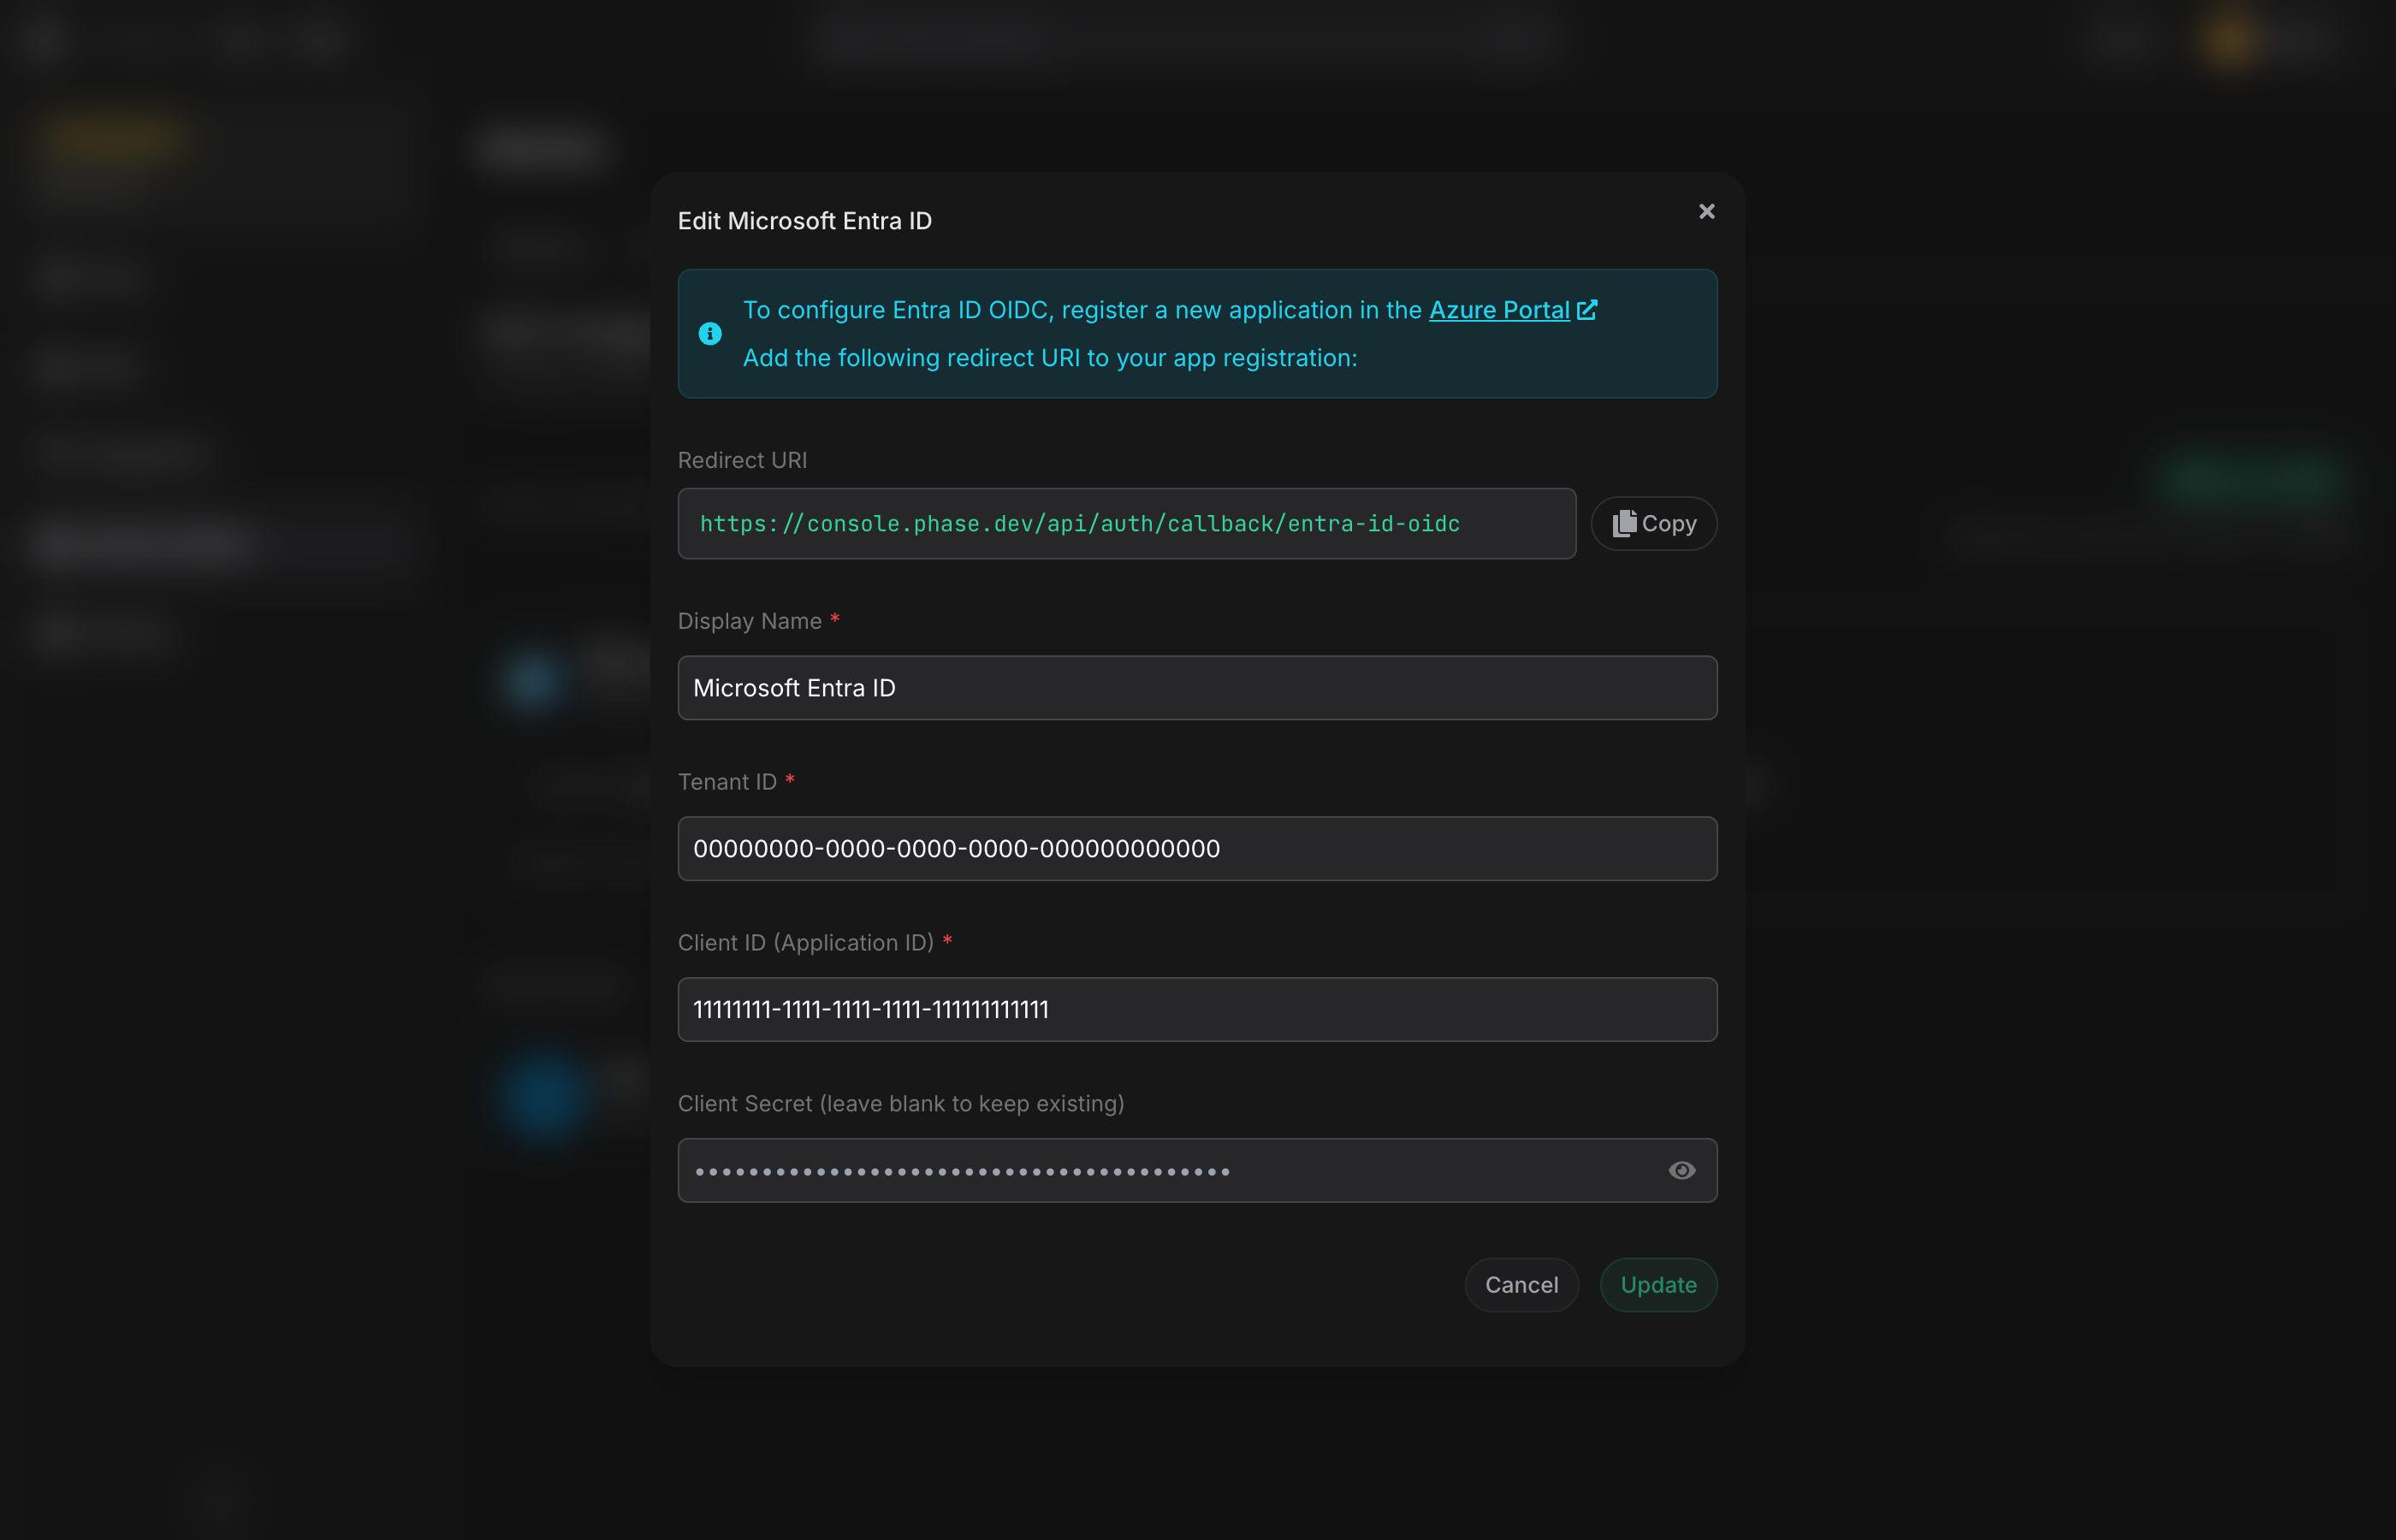
A setup dialog opens with a Redirect URI shown at the top — copy this value; you will register it in your identity provider as an authorised redirect URI.
-
Register a new application in your identity provider:
Entra ID: register an application in the Azure Portal under Microsoft Entra ID → App registrations. Note the Tenant ID, Application (client) ID, and generate a new Client secret.
Okta: create an OIDC Web Application in your Okta admin console. Note the Issuer URL (your Okta org domain, e.g.
https://dev-12345.okta.com), Client ID, and Client secret.NoteUse the org domain, not the admin console domain (
…-admin.okta.com). Okta issues tokens under the org domain, so an admin-domain issuer fails every sign-in. Phase rejects it at save time. -
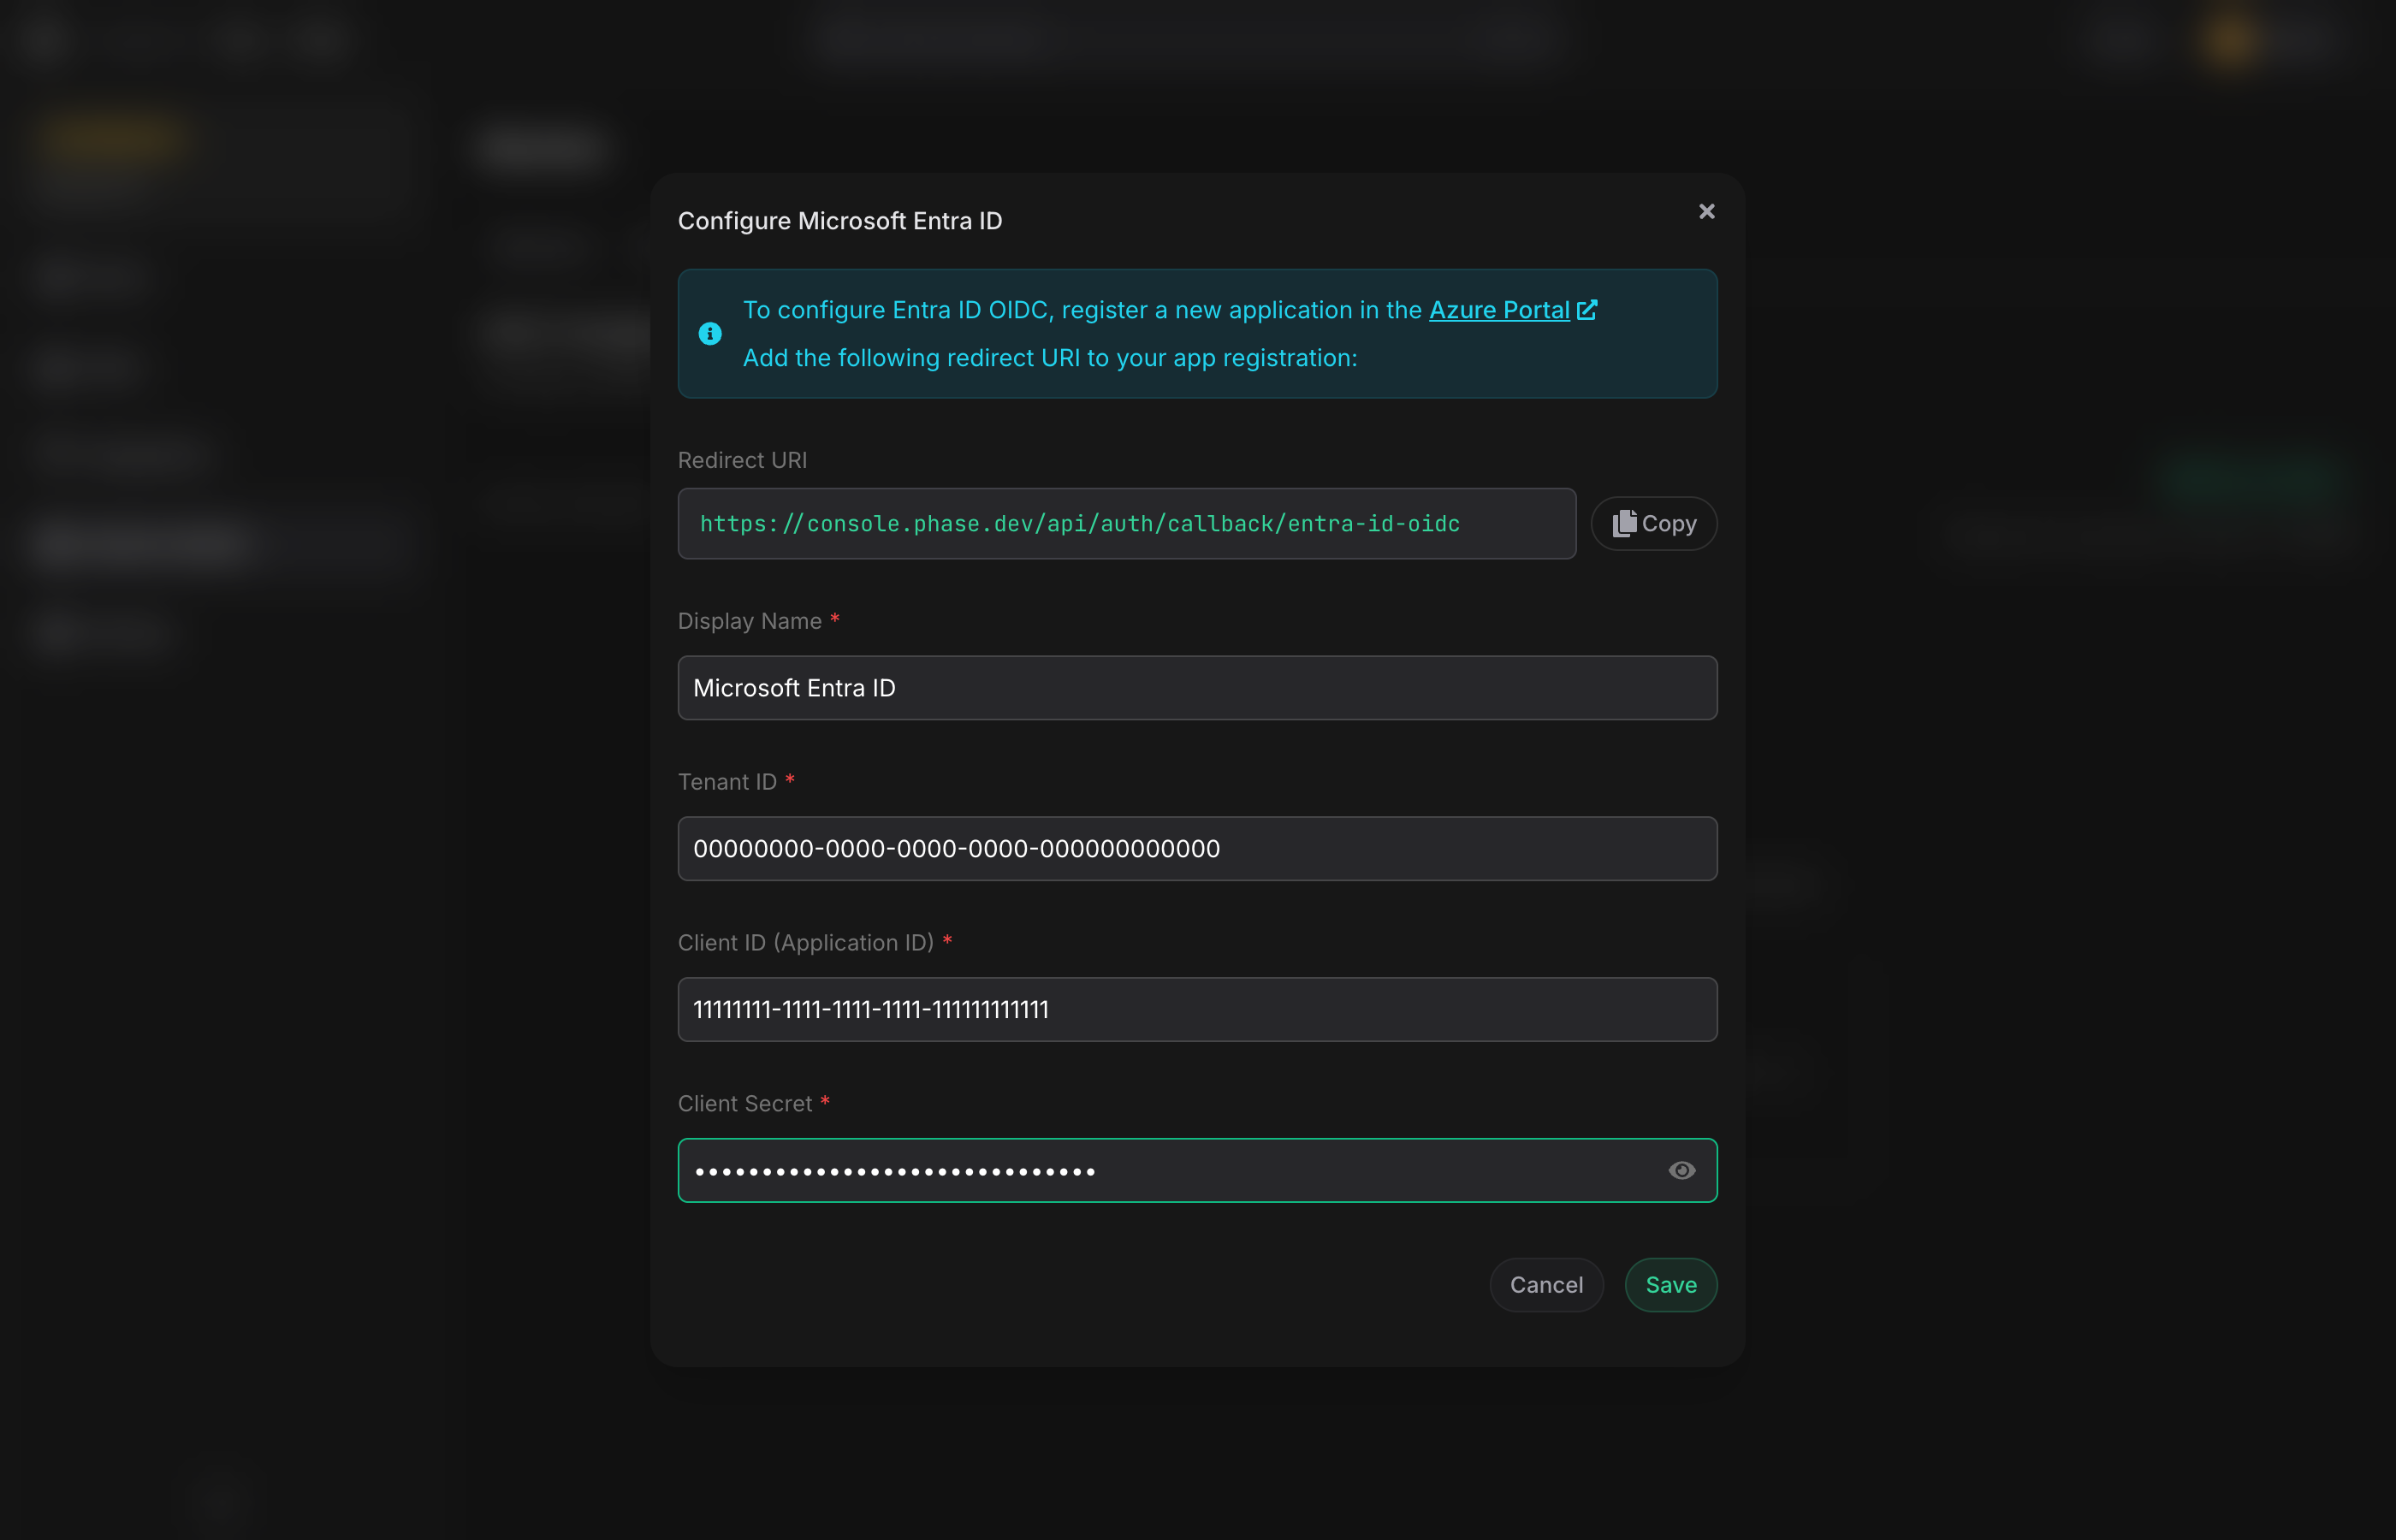
Return to the Console and fill in:
- Display Name (shown to members on the login page — e.g. "Acme Entra ID")
- Tenant ID / Issuer URL (provider-specific)
- Client ID
- Client Secret — encrypted client-side before submission
-
Click Save. Phase fetches the provider's OIDC discovery document and makes sure the configured issuer matches the value the provider reports. If they do not match, the save is rejected and the error shows the correct value to use. The provider is created but not yet active.
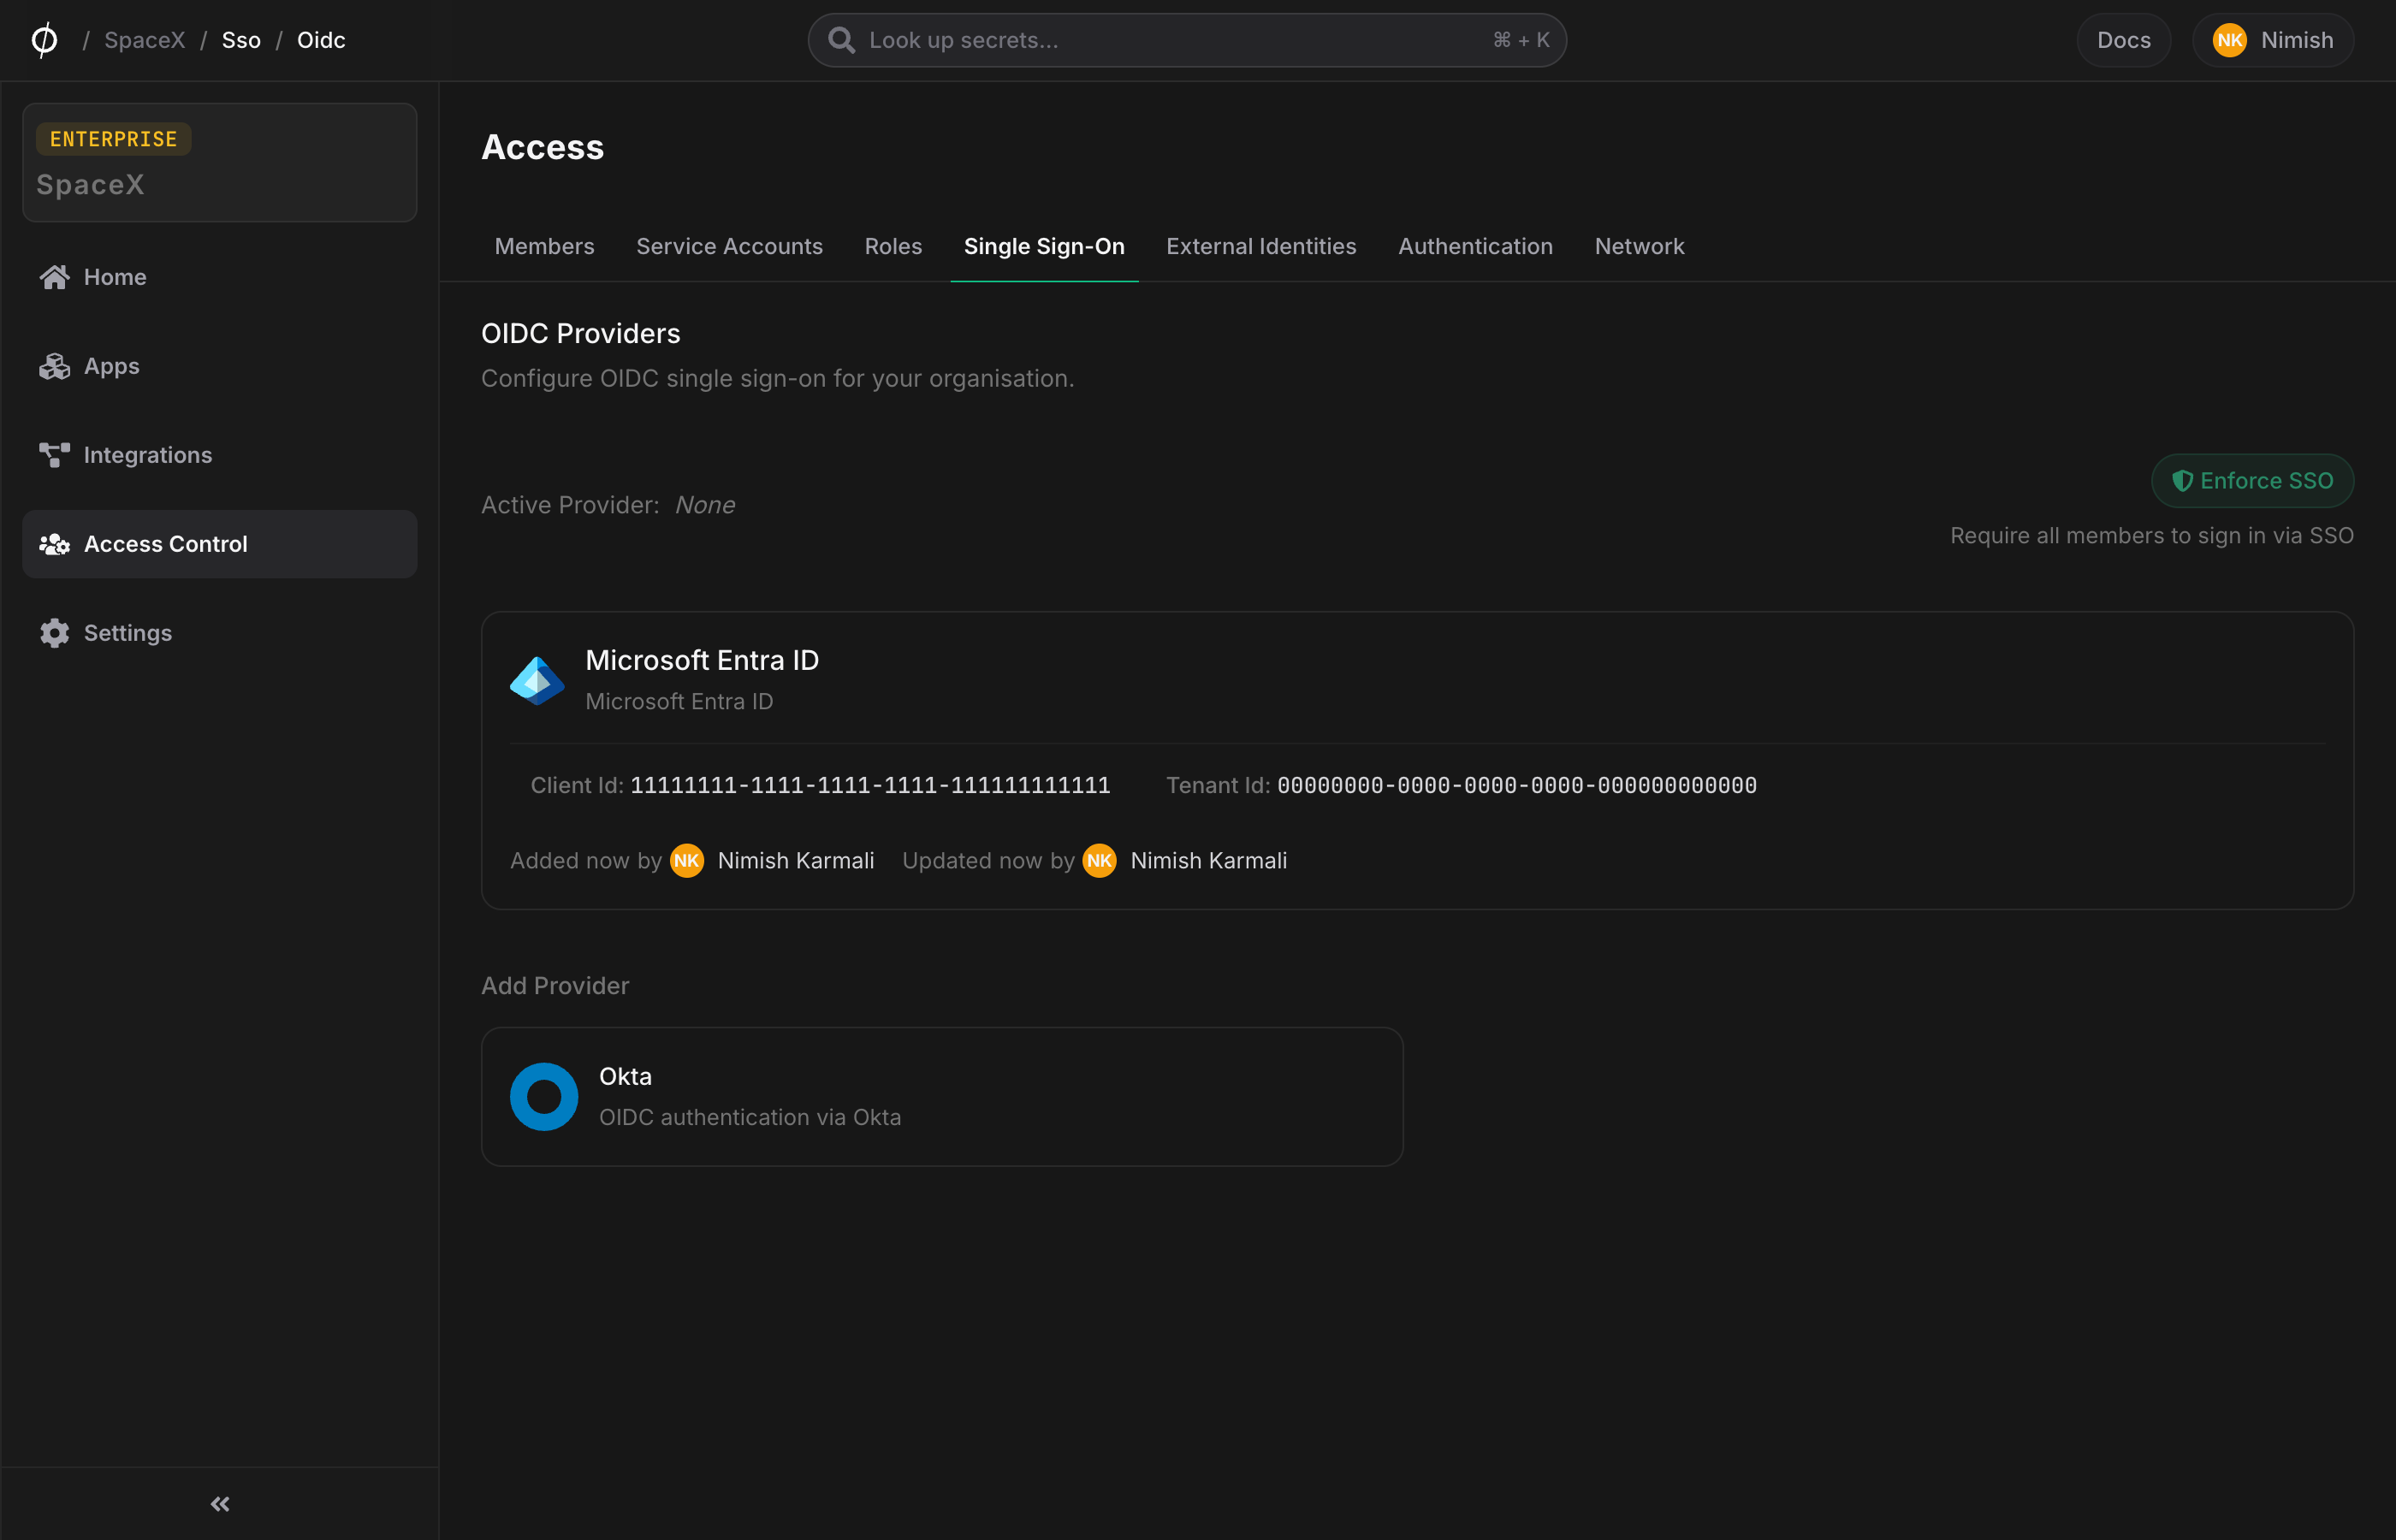
Activate
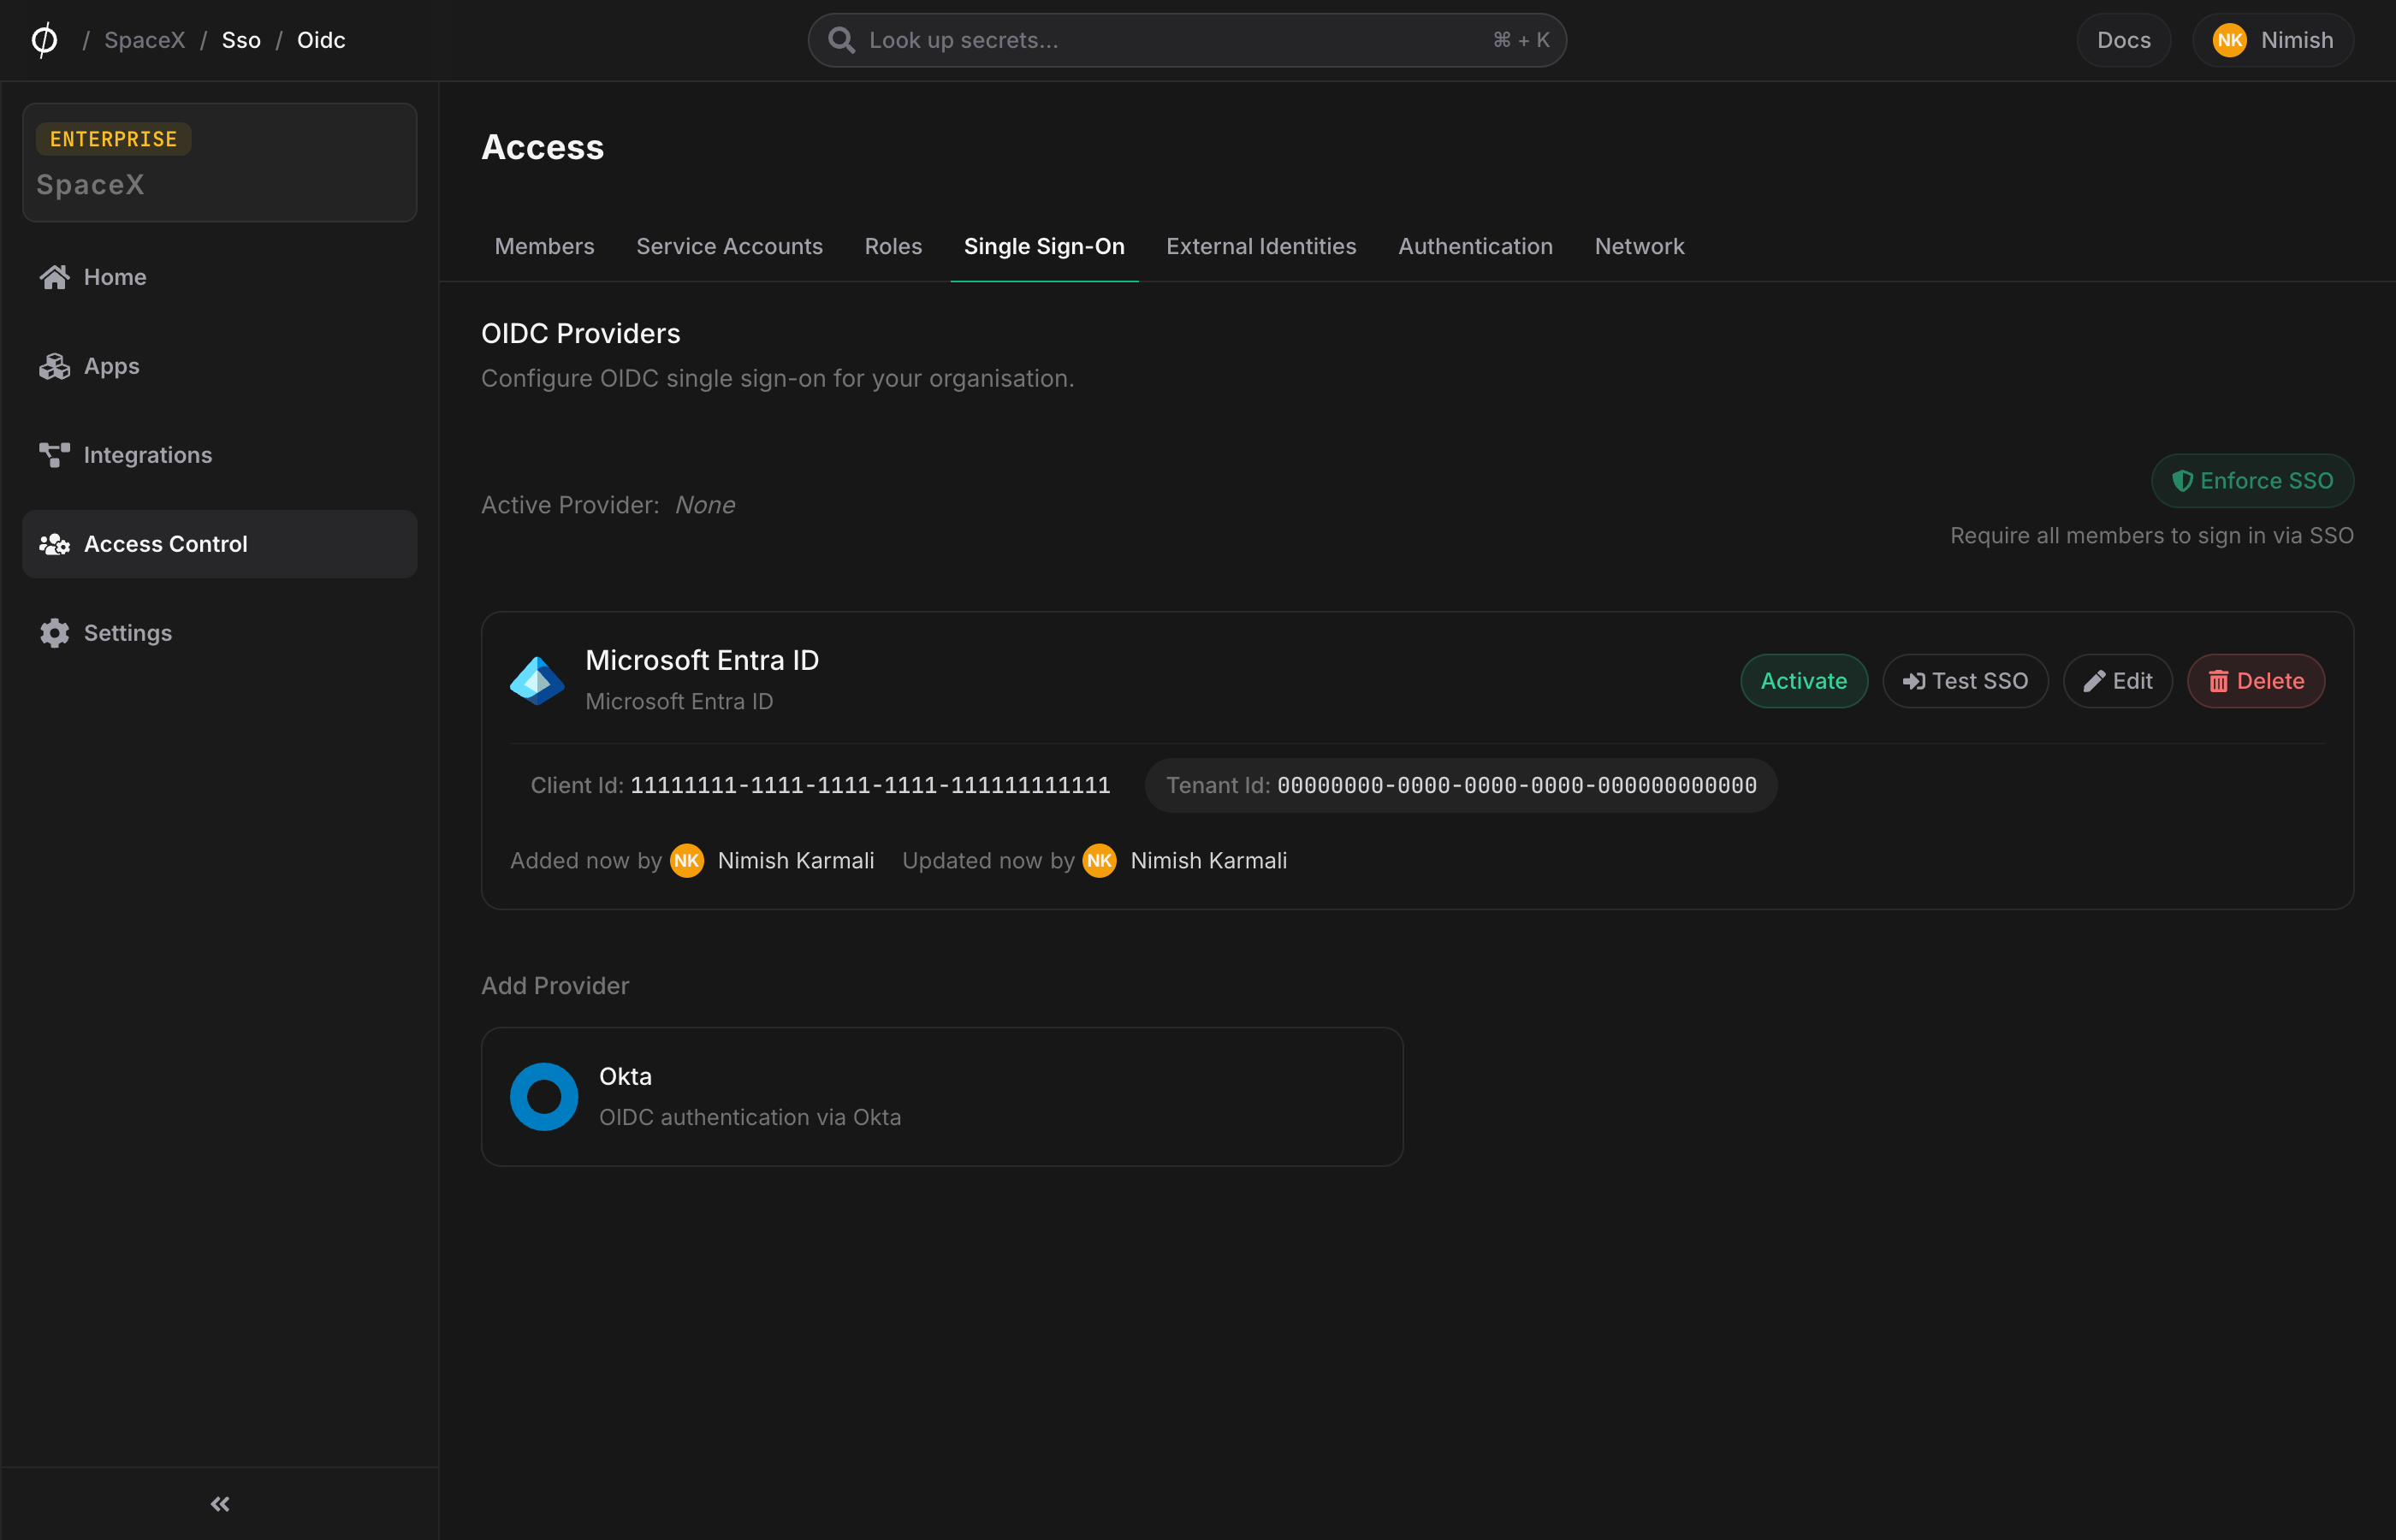
Hover the configured provider card and click Activate. Only one provider per organisation can be active at a time; activating one deactivates any other.
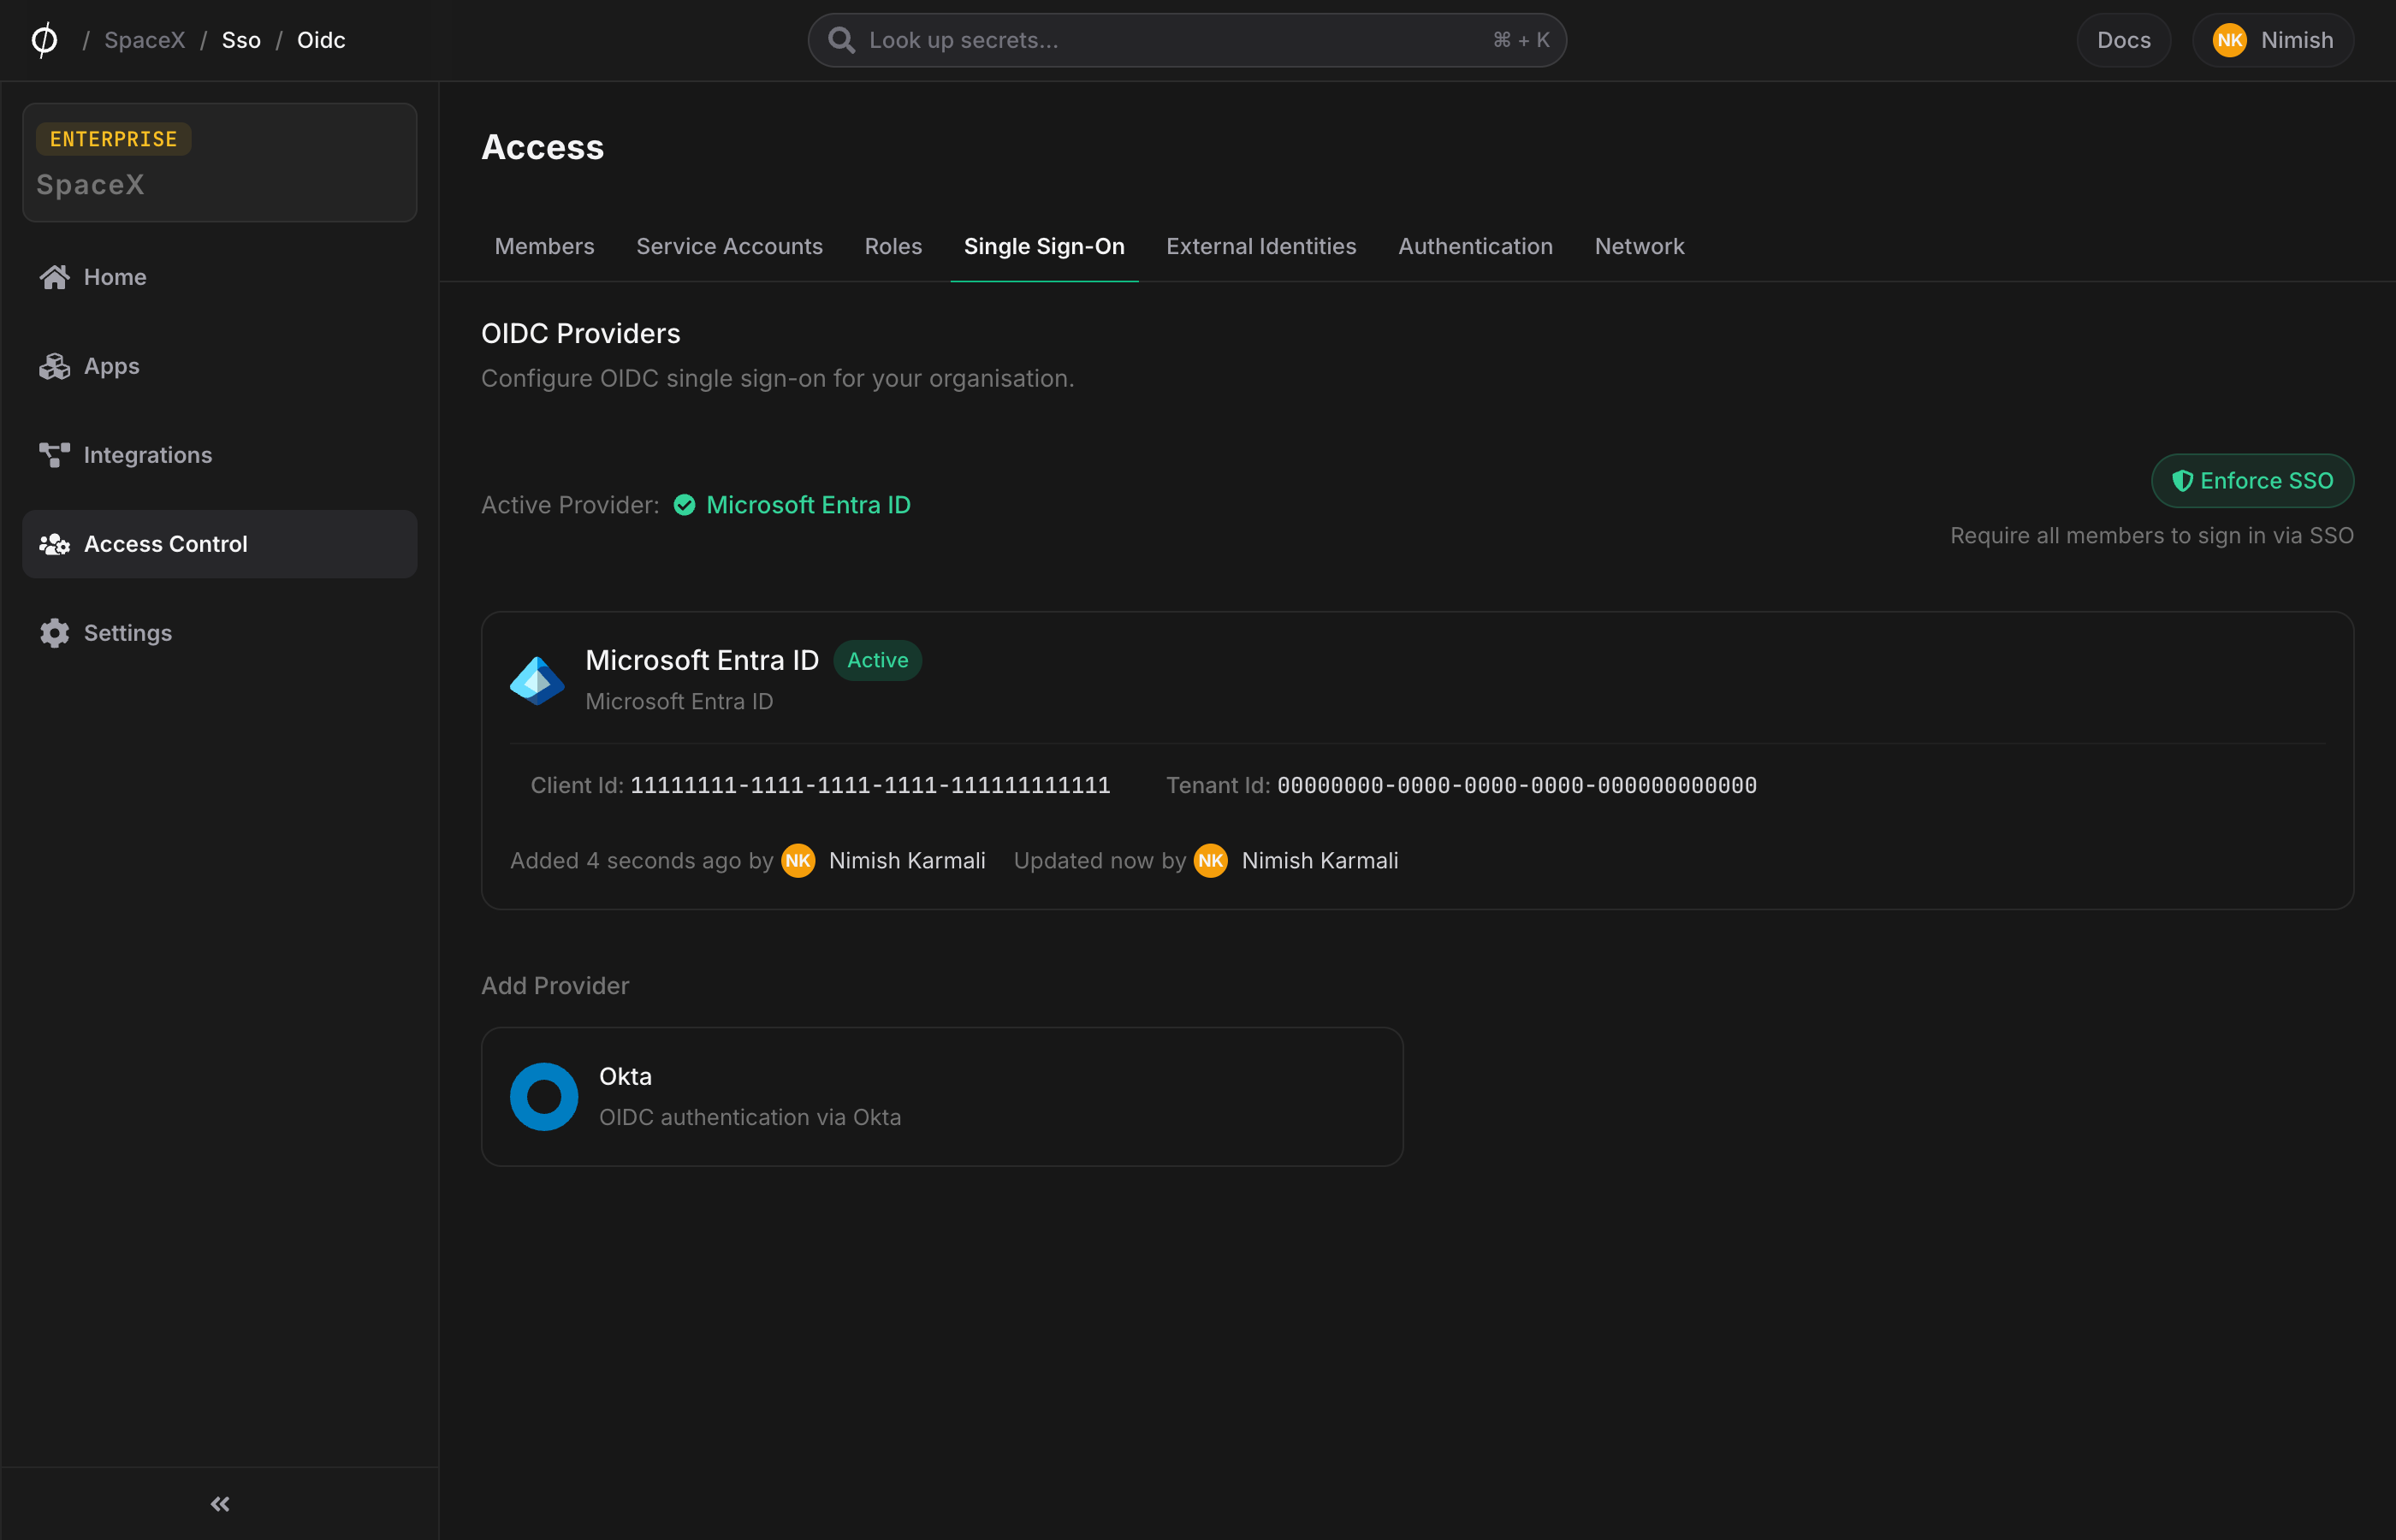
Once active, members will see a "Sign in with provider name" button on the login page after entering their email.
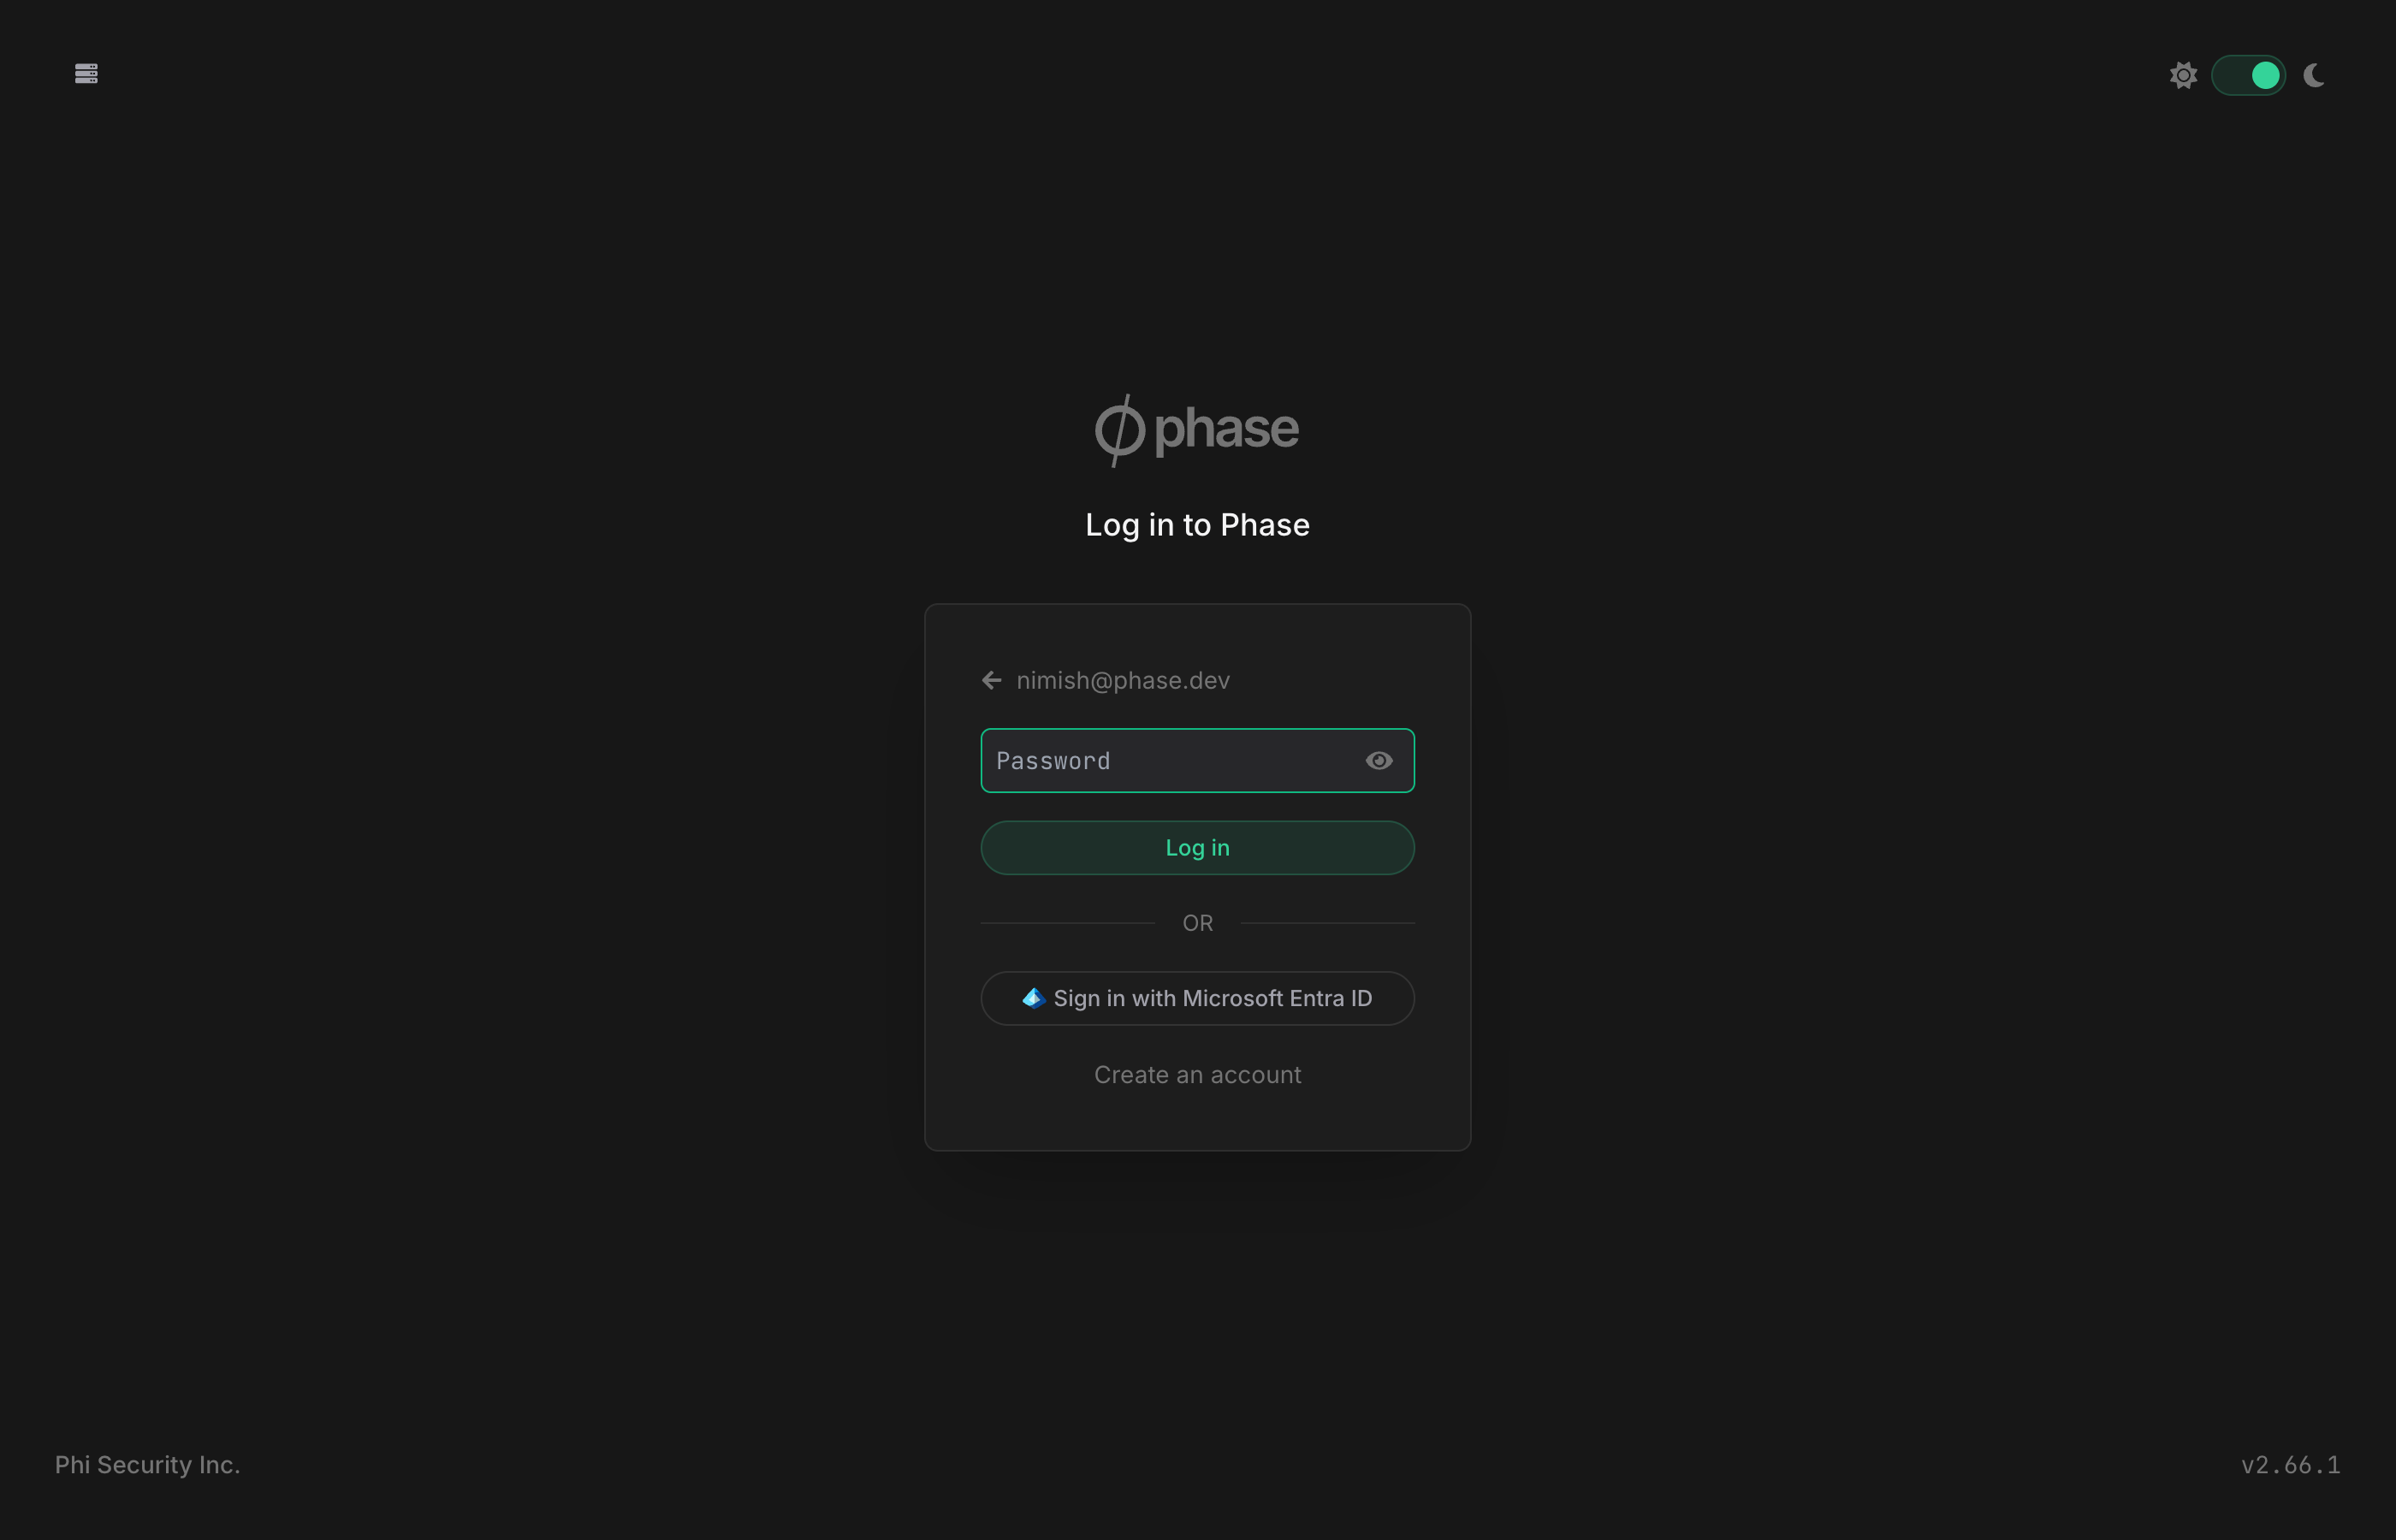
Test SSO
Before enforcing SSO on the whole organisation, run a Test SSO flow to confirm the provider config works end-to-end.
-
Hover the active provider card and click Test SSO.
-
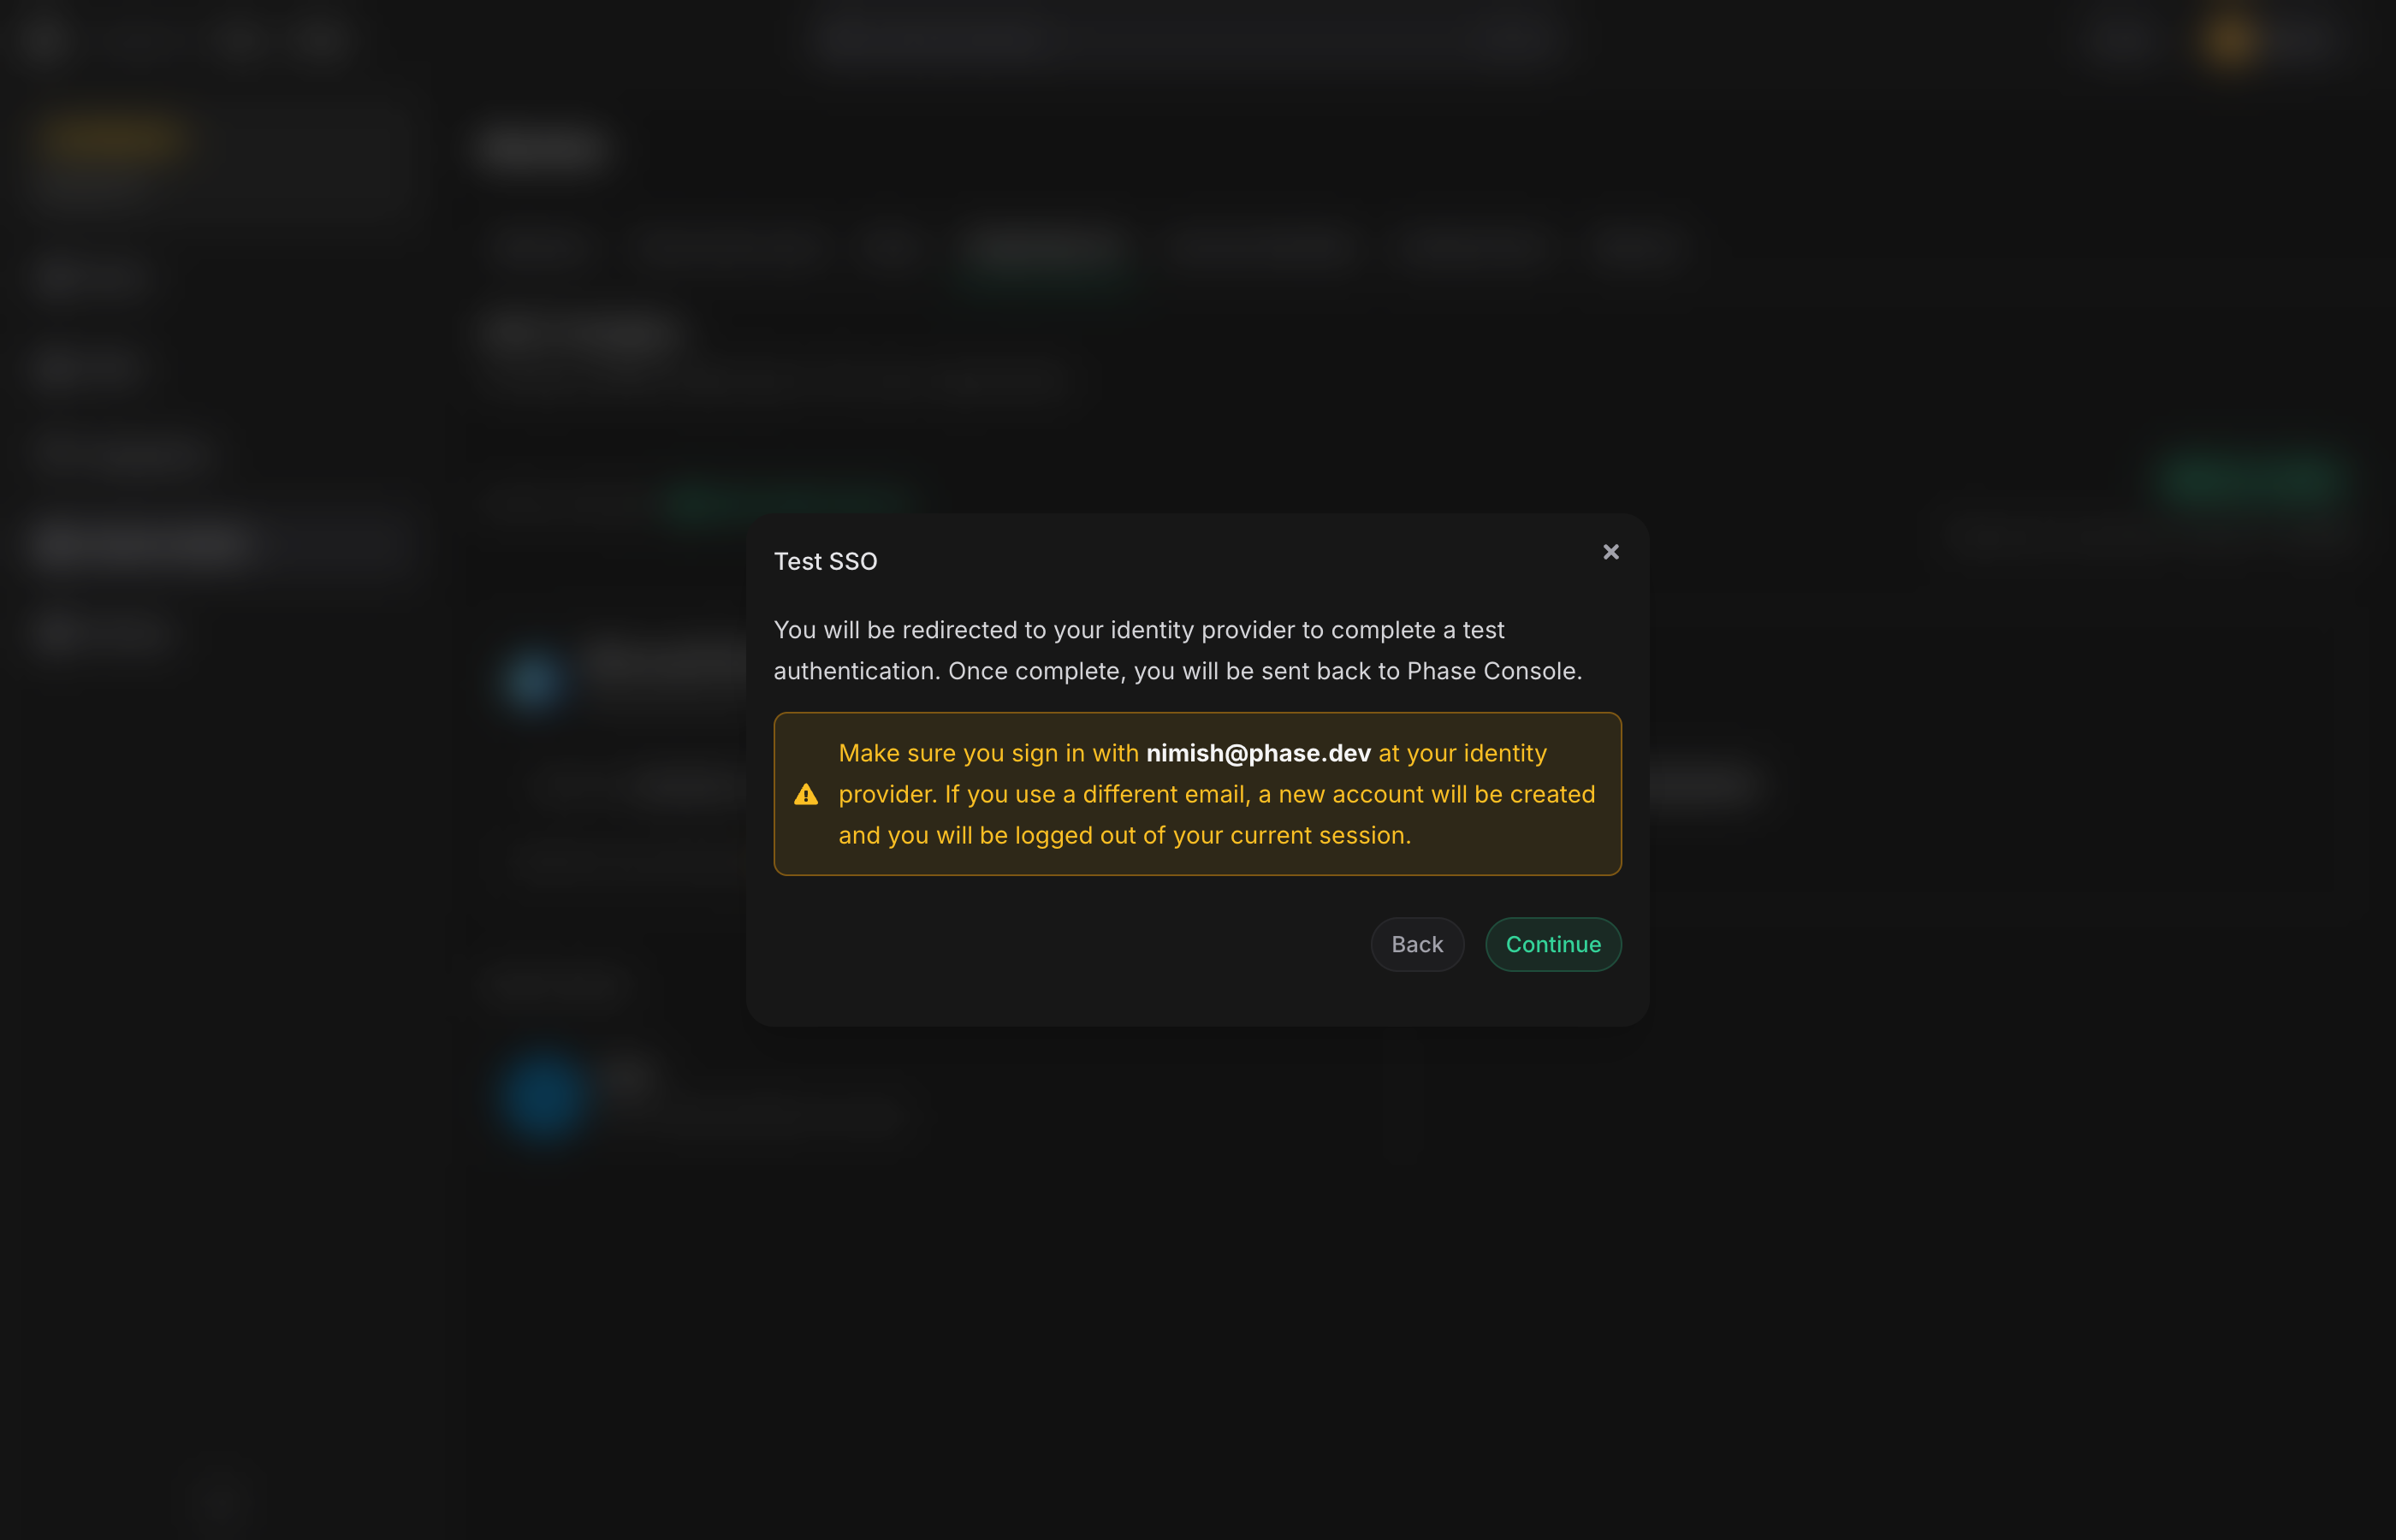
Confirm the redirect dialog. Make sure the email in the warning matches your identity-provider account — if you sign in with a different email, Phase creates a new account rather than testing your existing one.
-
Click Continue. You are redirected to the identity provider, sign in, and return to the Phase Console.
A successful round-trip brings you back to the SSO settings page.
Enforce SSO
Enforcing SSO disables password login for all members of the organisation and requires every sign-in to go through the configured provider.
Before enforcing, make sure every member can actually sign in through the provider. Members who joined with a different method (for example Google OAuth or a password) must link the organisation's SSO identity from their Account page first. Phase never automatically attaches a new sign-in identity to an existing account based on a matching email. You can track linking progress in the organisation's audit log.
-
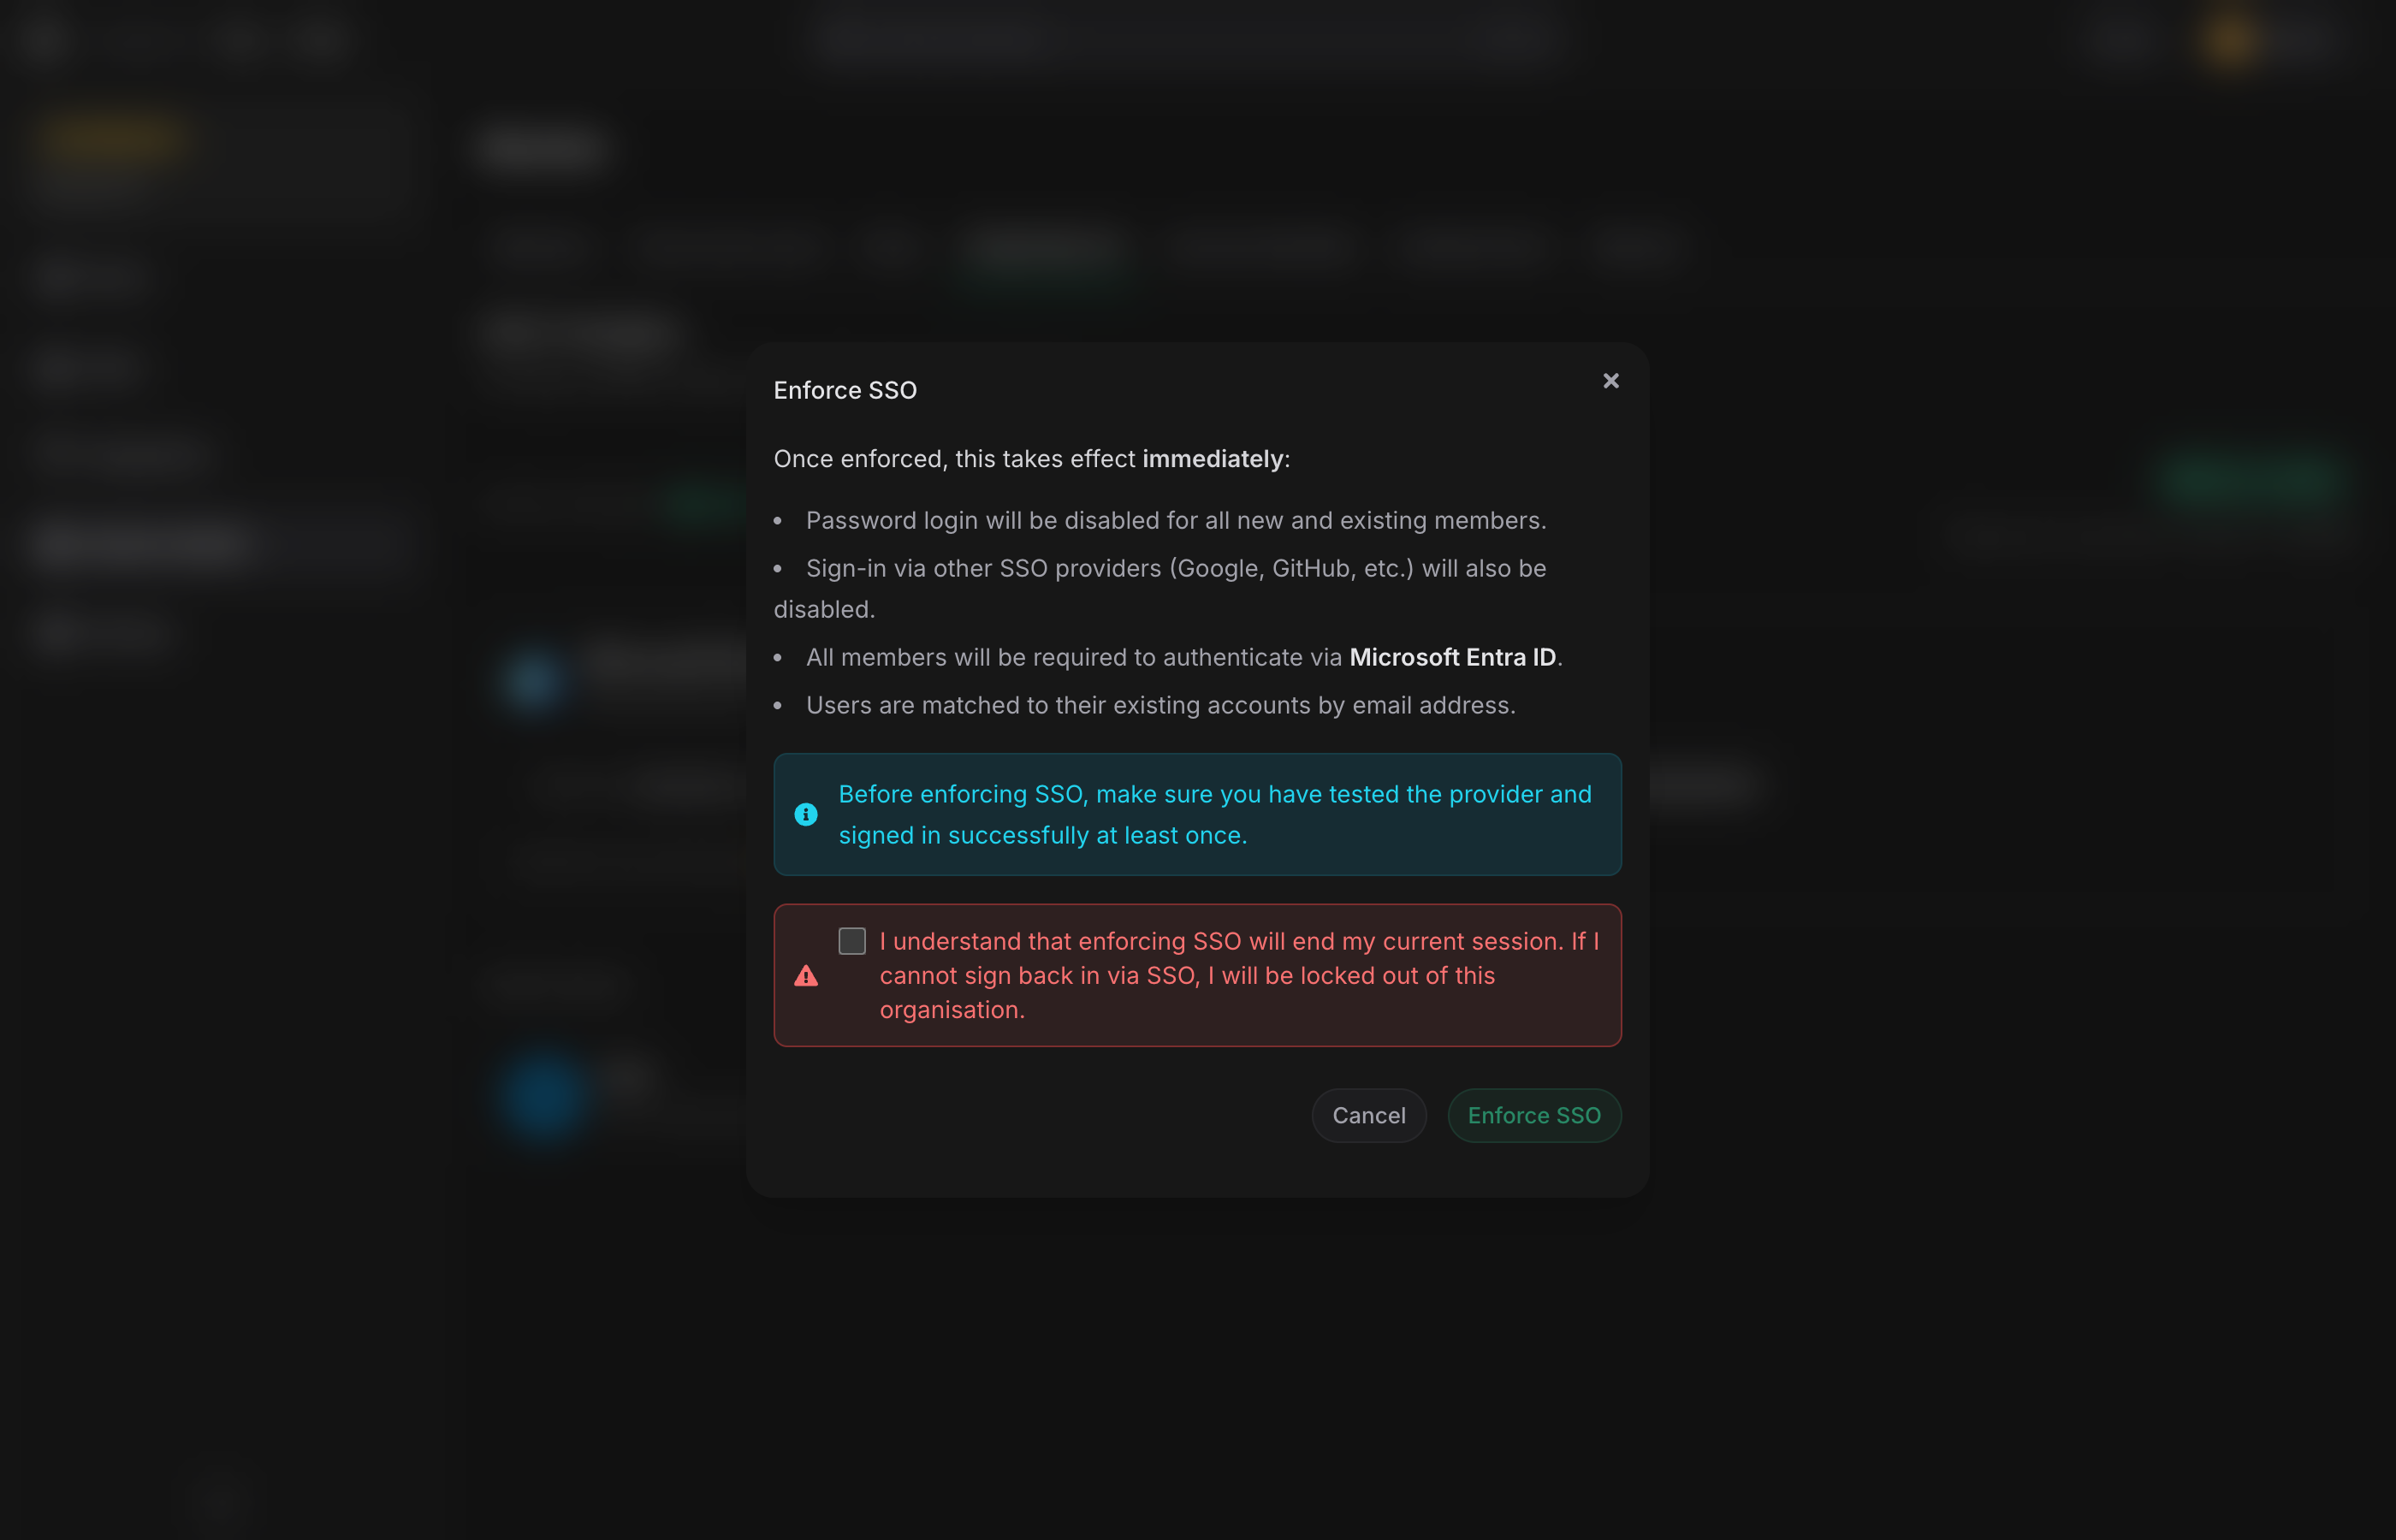
Click Enforce SSO. A confirmation dialog appears.
-
Read the effects — password login disabled, other SSO providers disabled, all members required to authenticate via the active provider, users matched to their existing accounts by email.
-
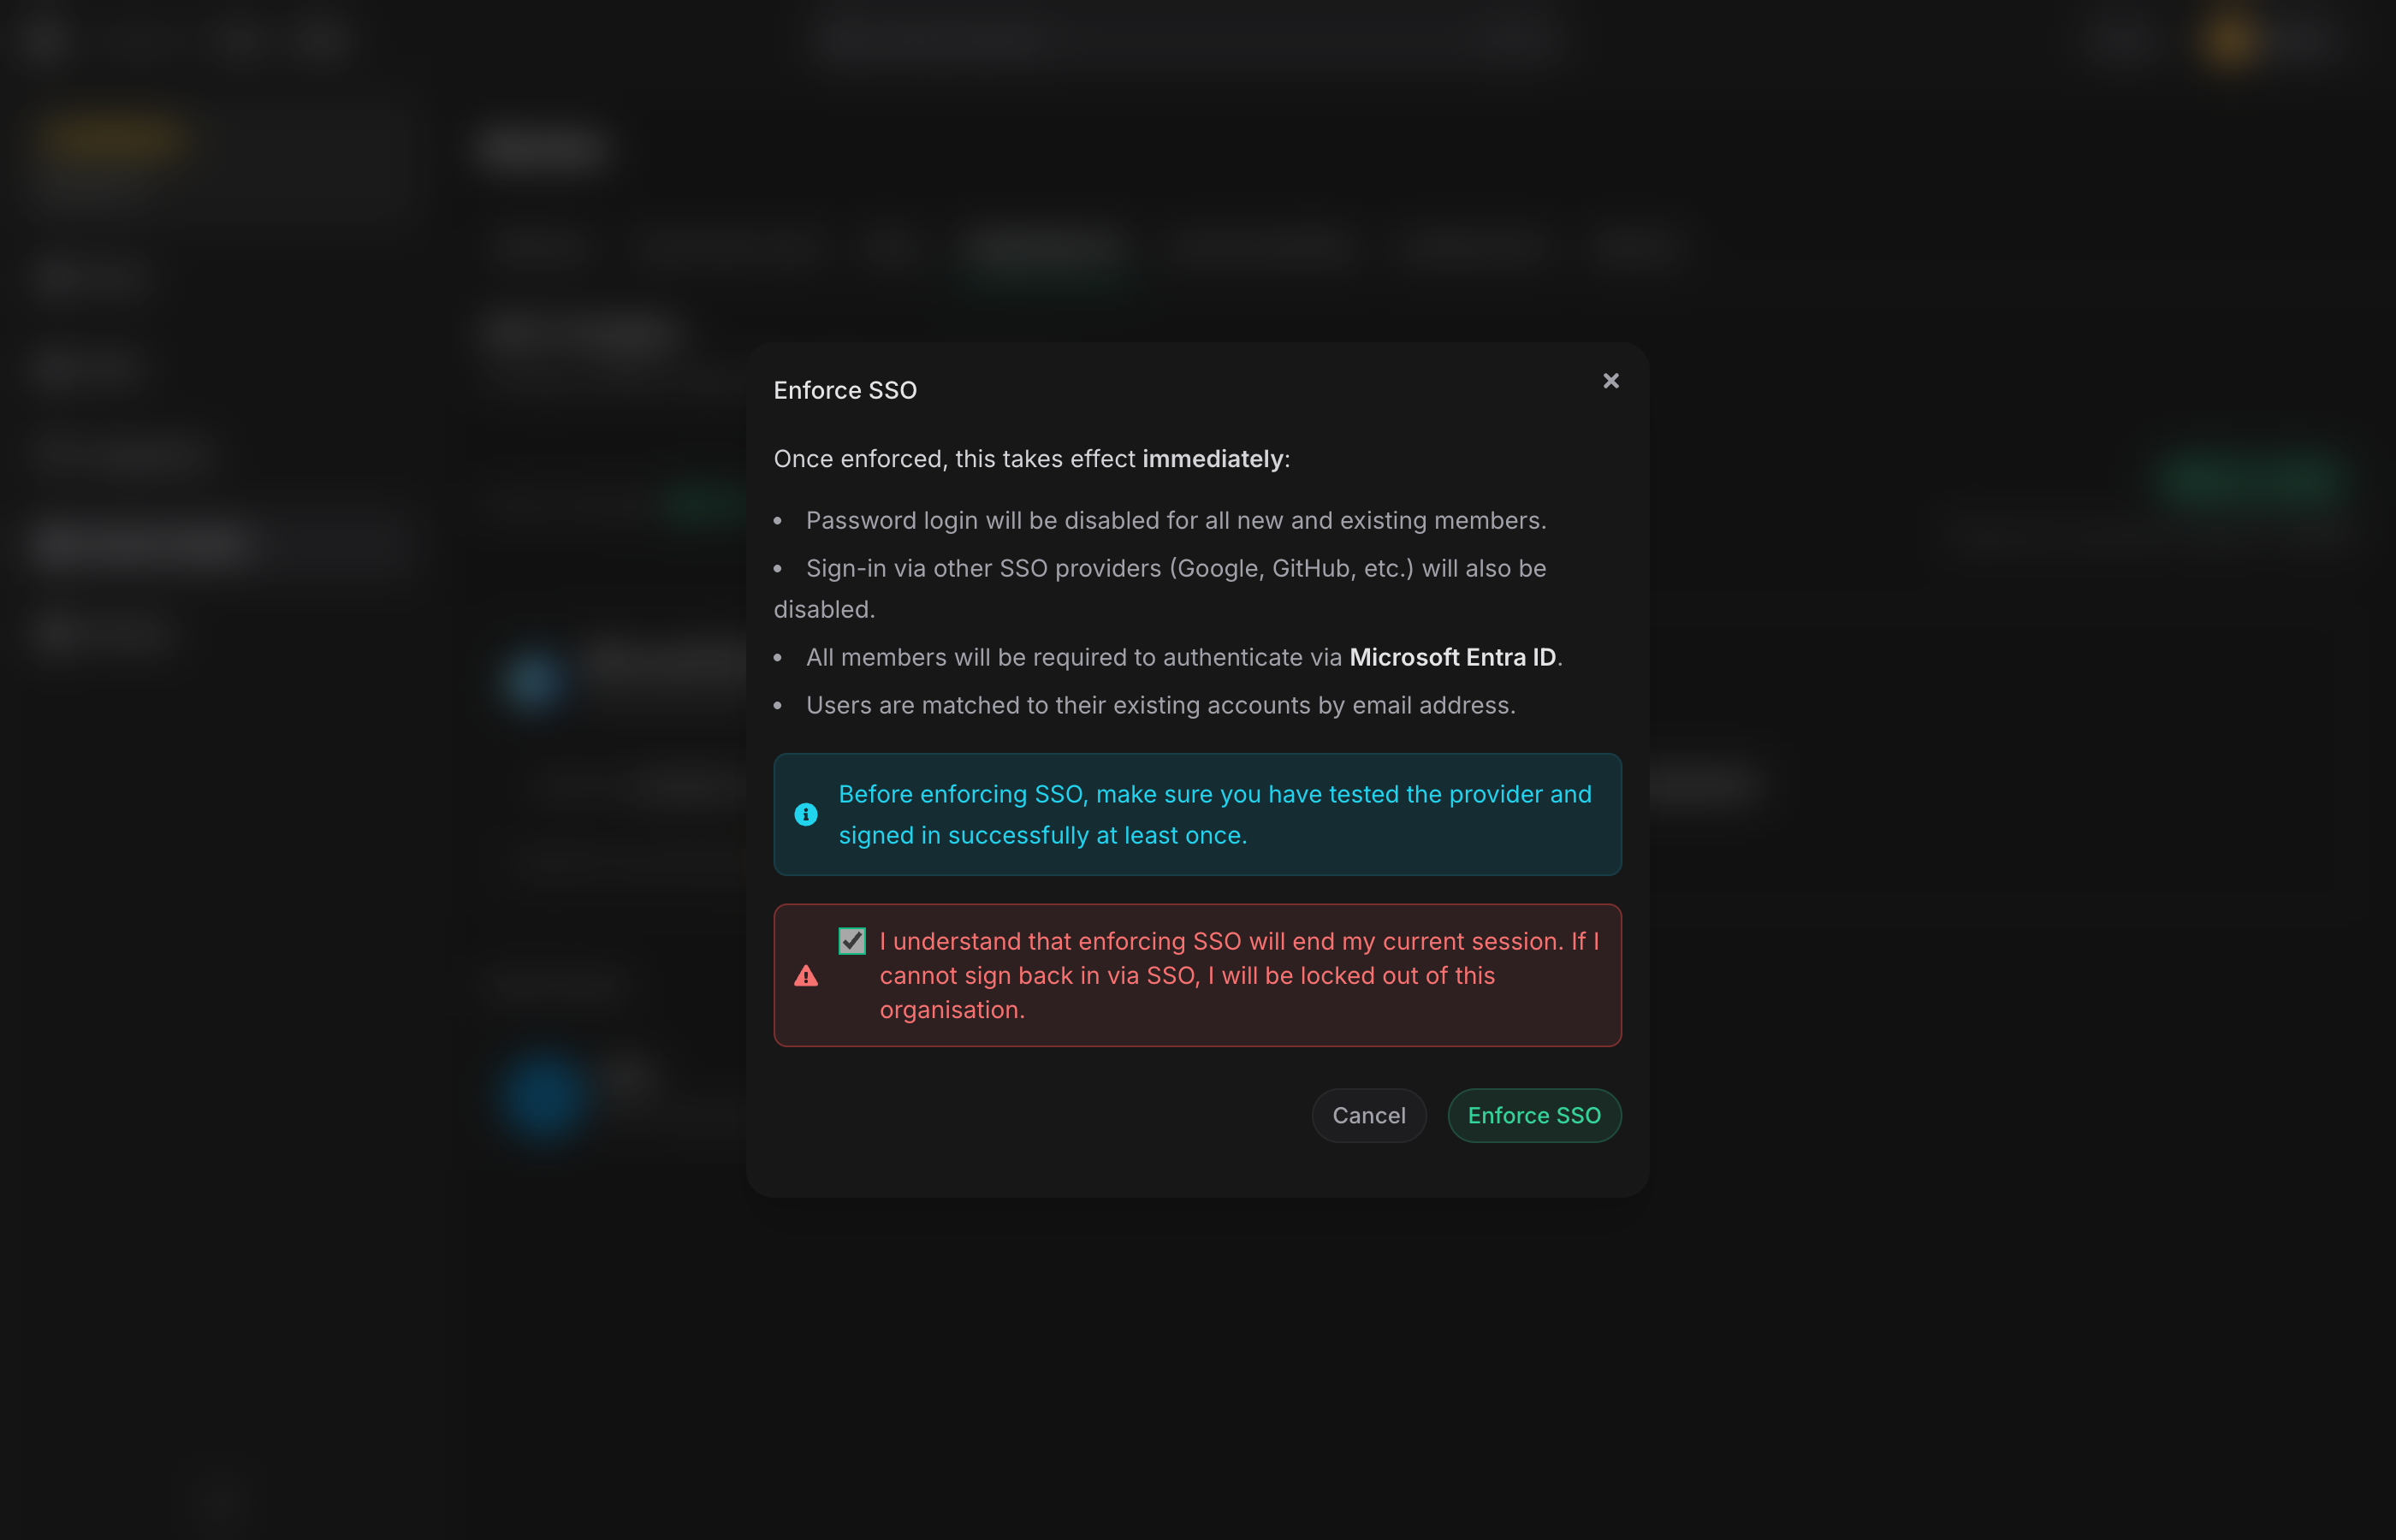
Tick the acknowledgement checkbox confirming you understand enforcement will end your current session.
-
Click Enforce SSO.
If your current session was established via the organisation's SSO provider, enforcement takes effect immediately and you stay signed in. If you enforced from a password-authenticated session, Phase signs you out and redirects you to the login page — sign back in via SSO to continue.
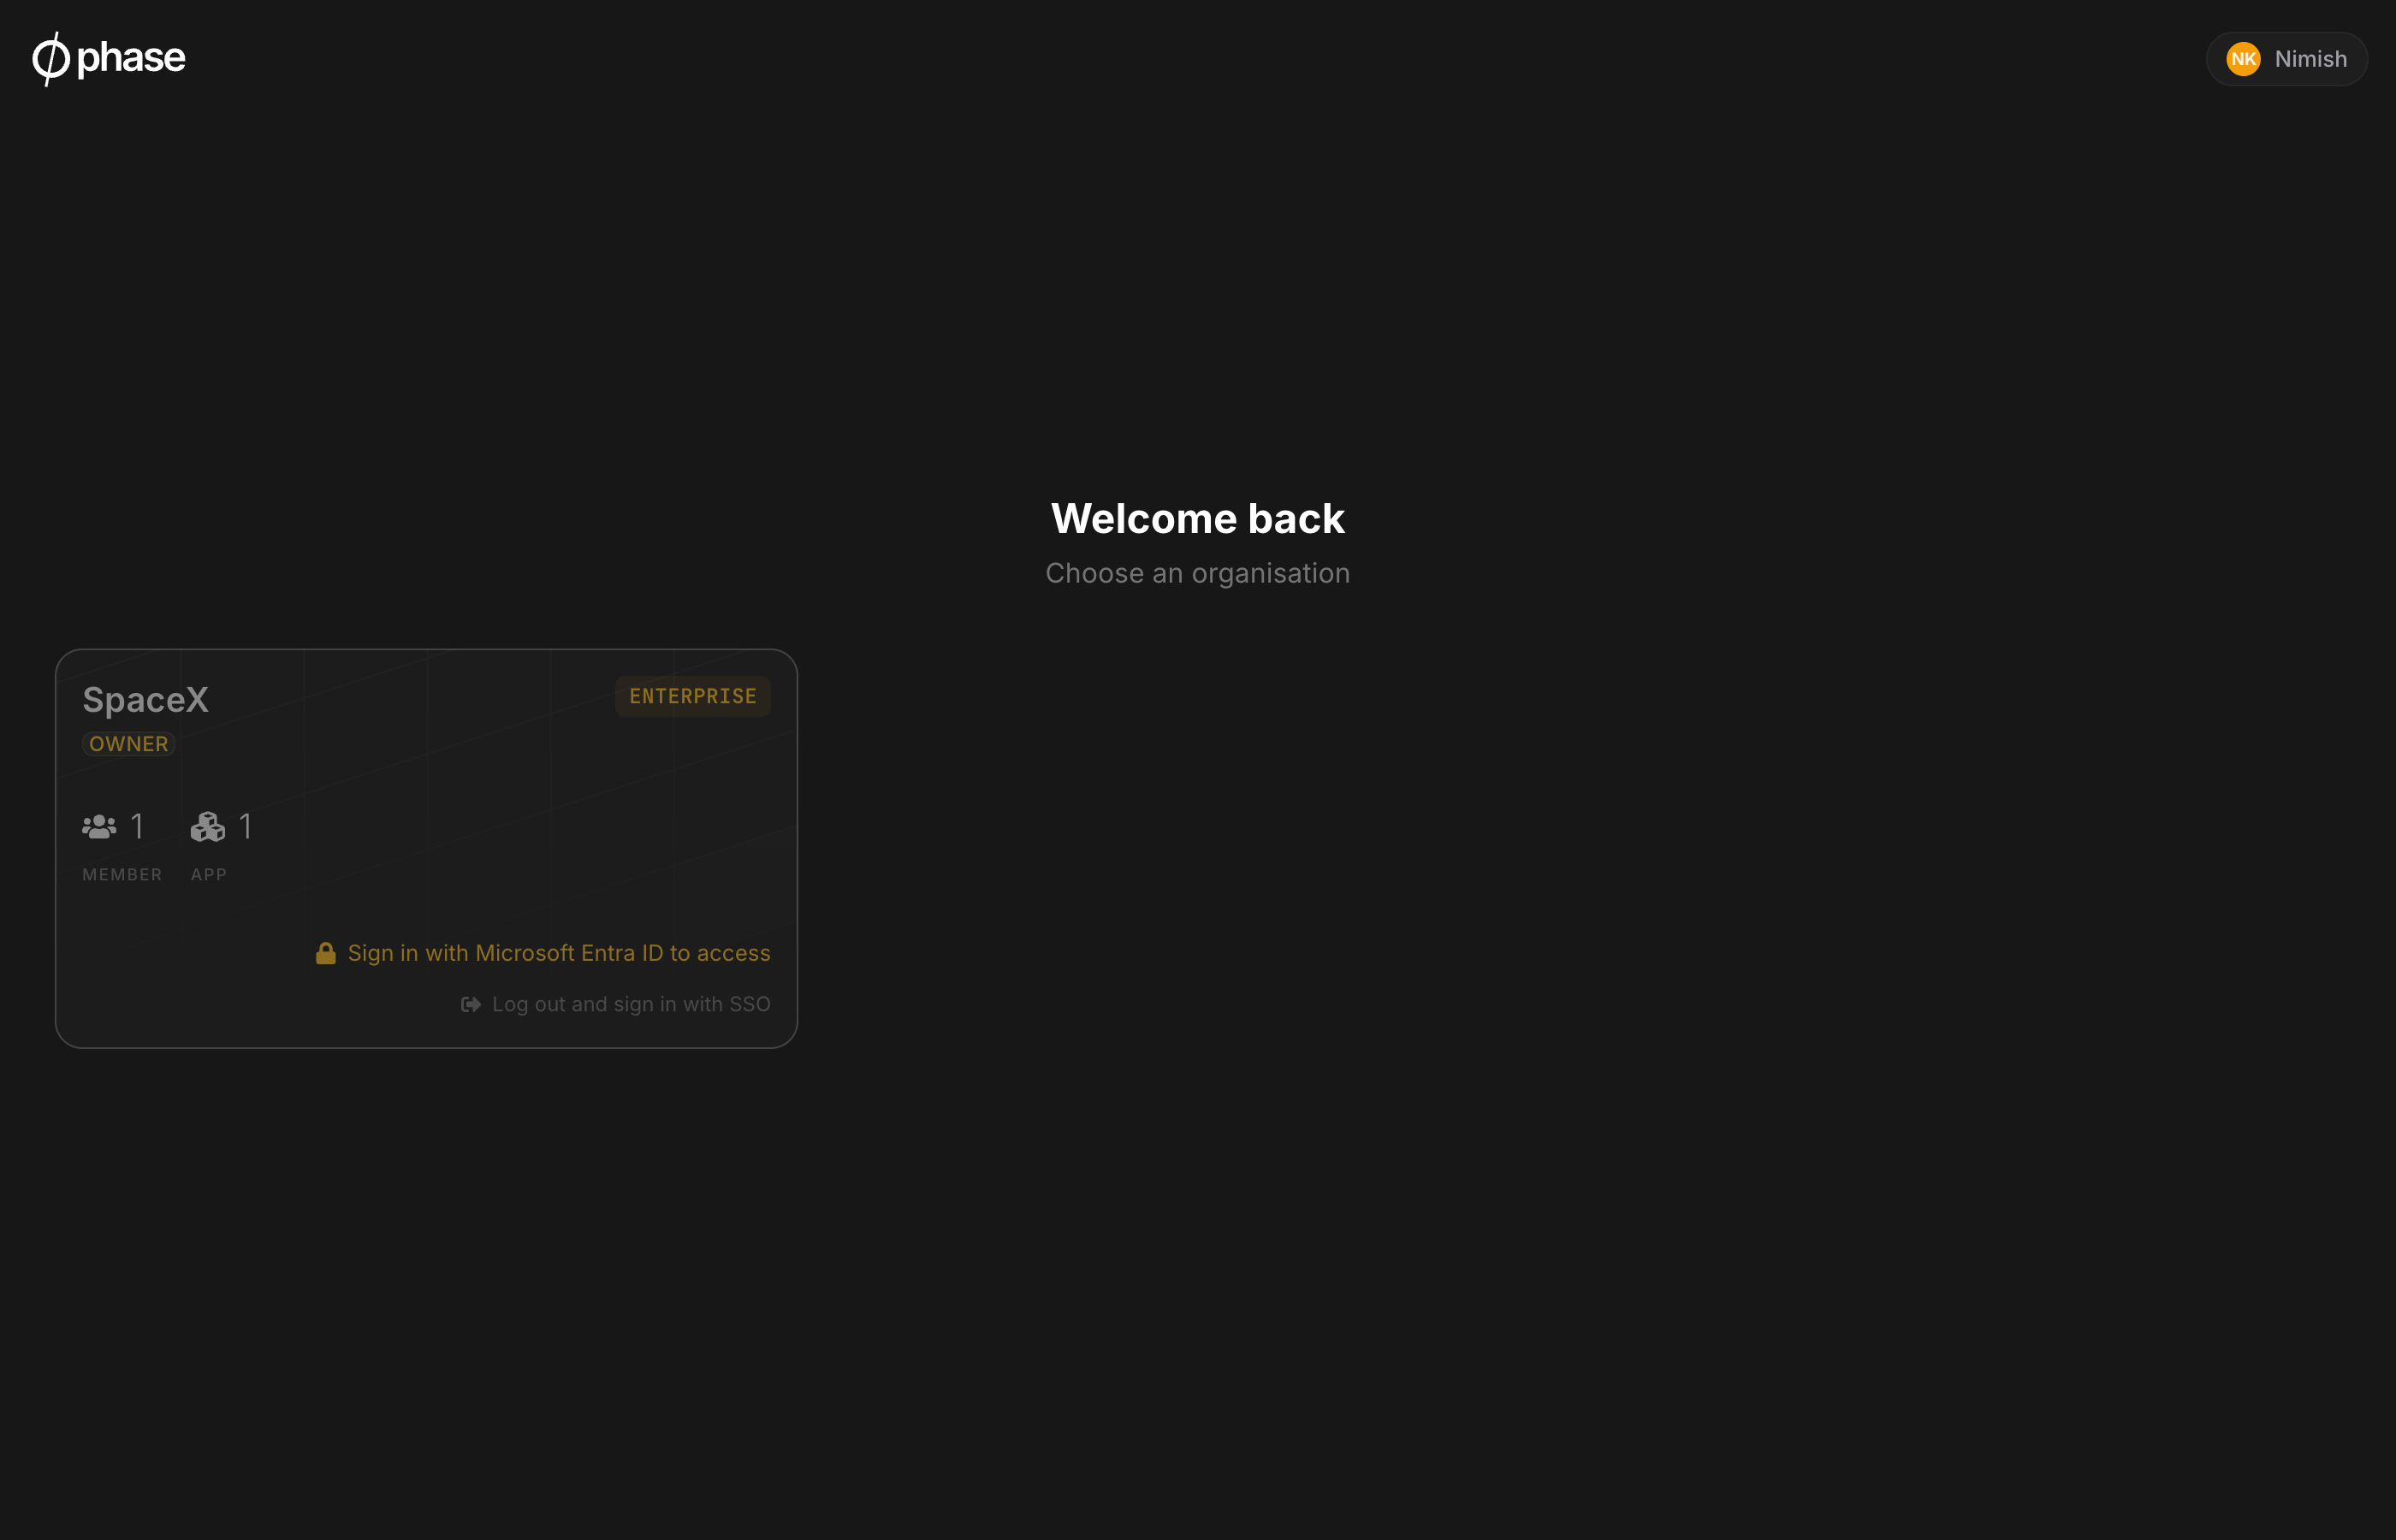
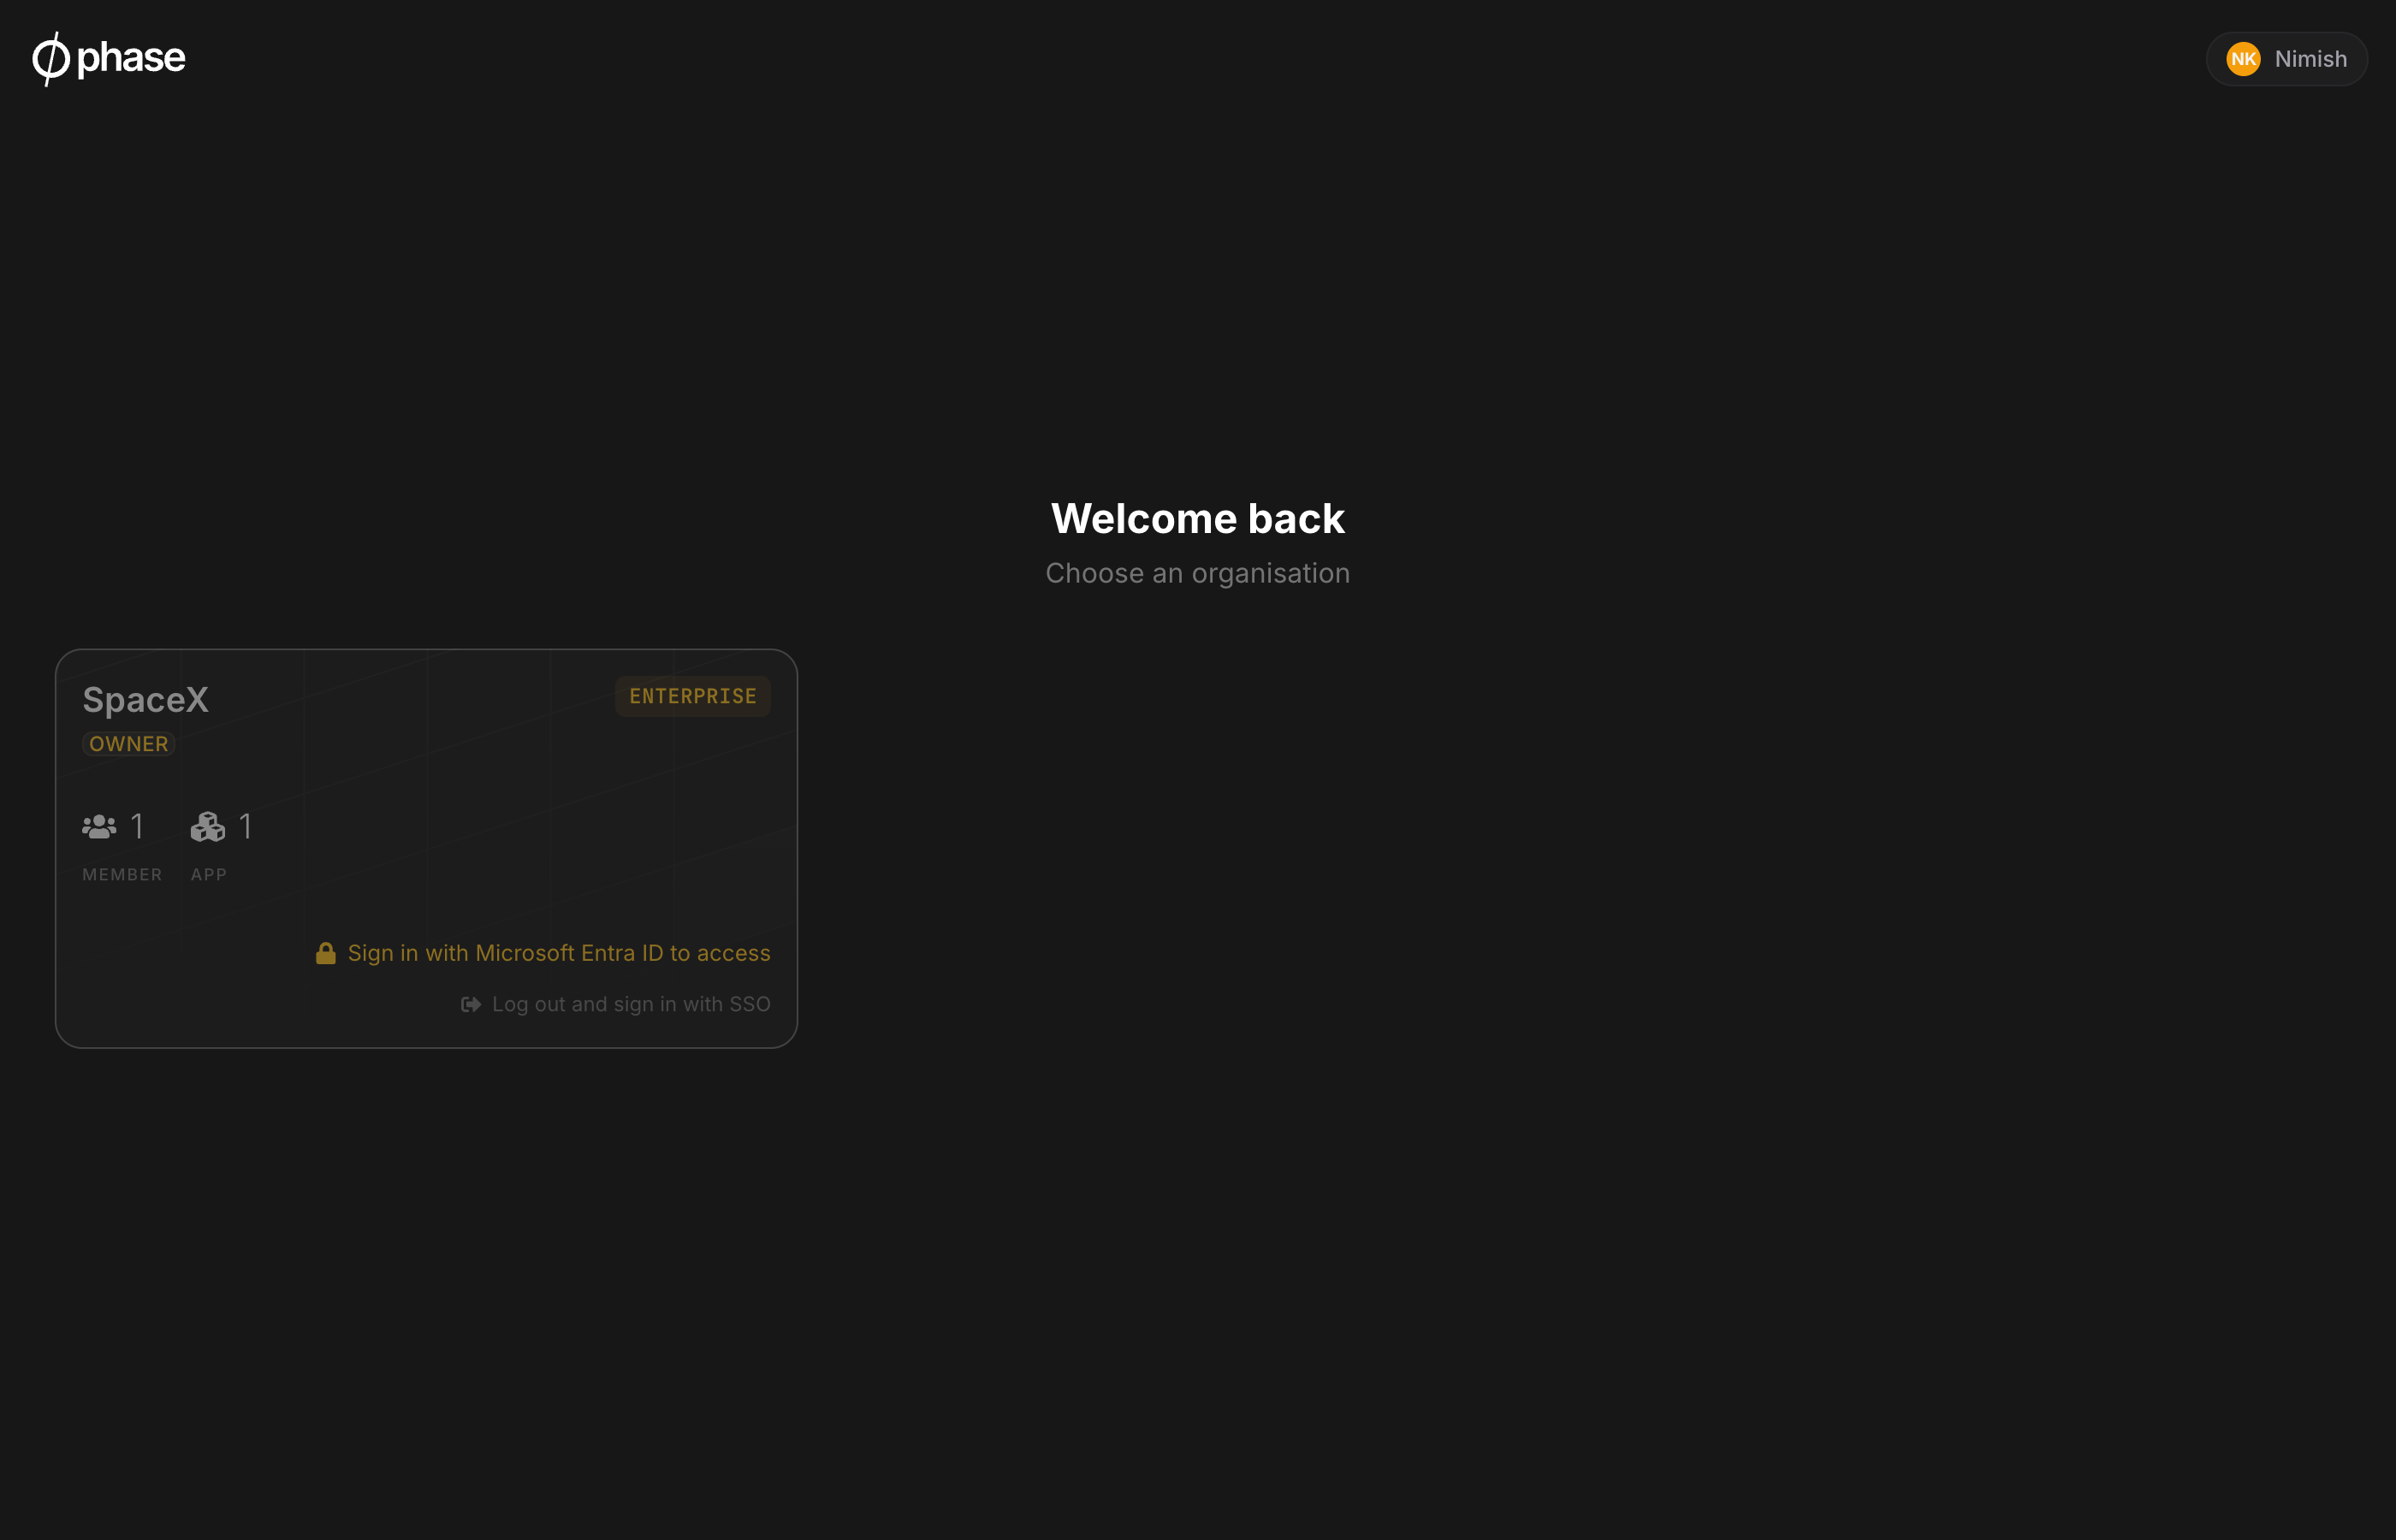
Other members' existing sessions remain active for open tabs but will be rejected on the next request. They will be redirected to the lobby where a "Sign in with provider name" prompt appears next to the enforced organisation.
Inviting users to an enforced organisation
New users can sign up and accept their invite entirely through the organisation's SSO provider. Invited users who already have a Phase account follow a one-time bootstrap. Invite acceptance is exempt from SSO enforcement: they sign in with their existing method, accept the invite, and become a member. If their identity for the organisation's provider is already linked, the organisation's SSO works immediately after they join. If not, they link it from their Account page first. All other organisation access still requires the organisation's SSO session.
Disable enforcement
Click Disable SSO Enforcement on the SSO settings page. Members can sign in with a password again immediately.
Lockout protection
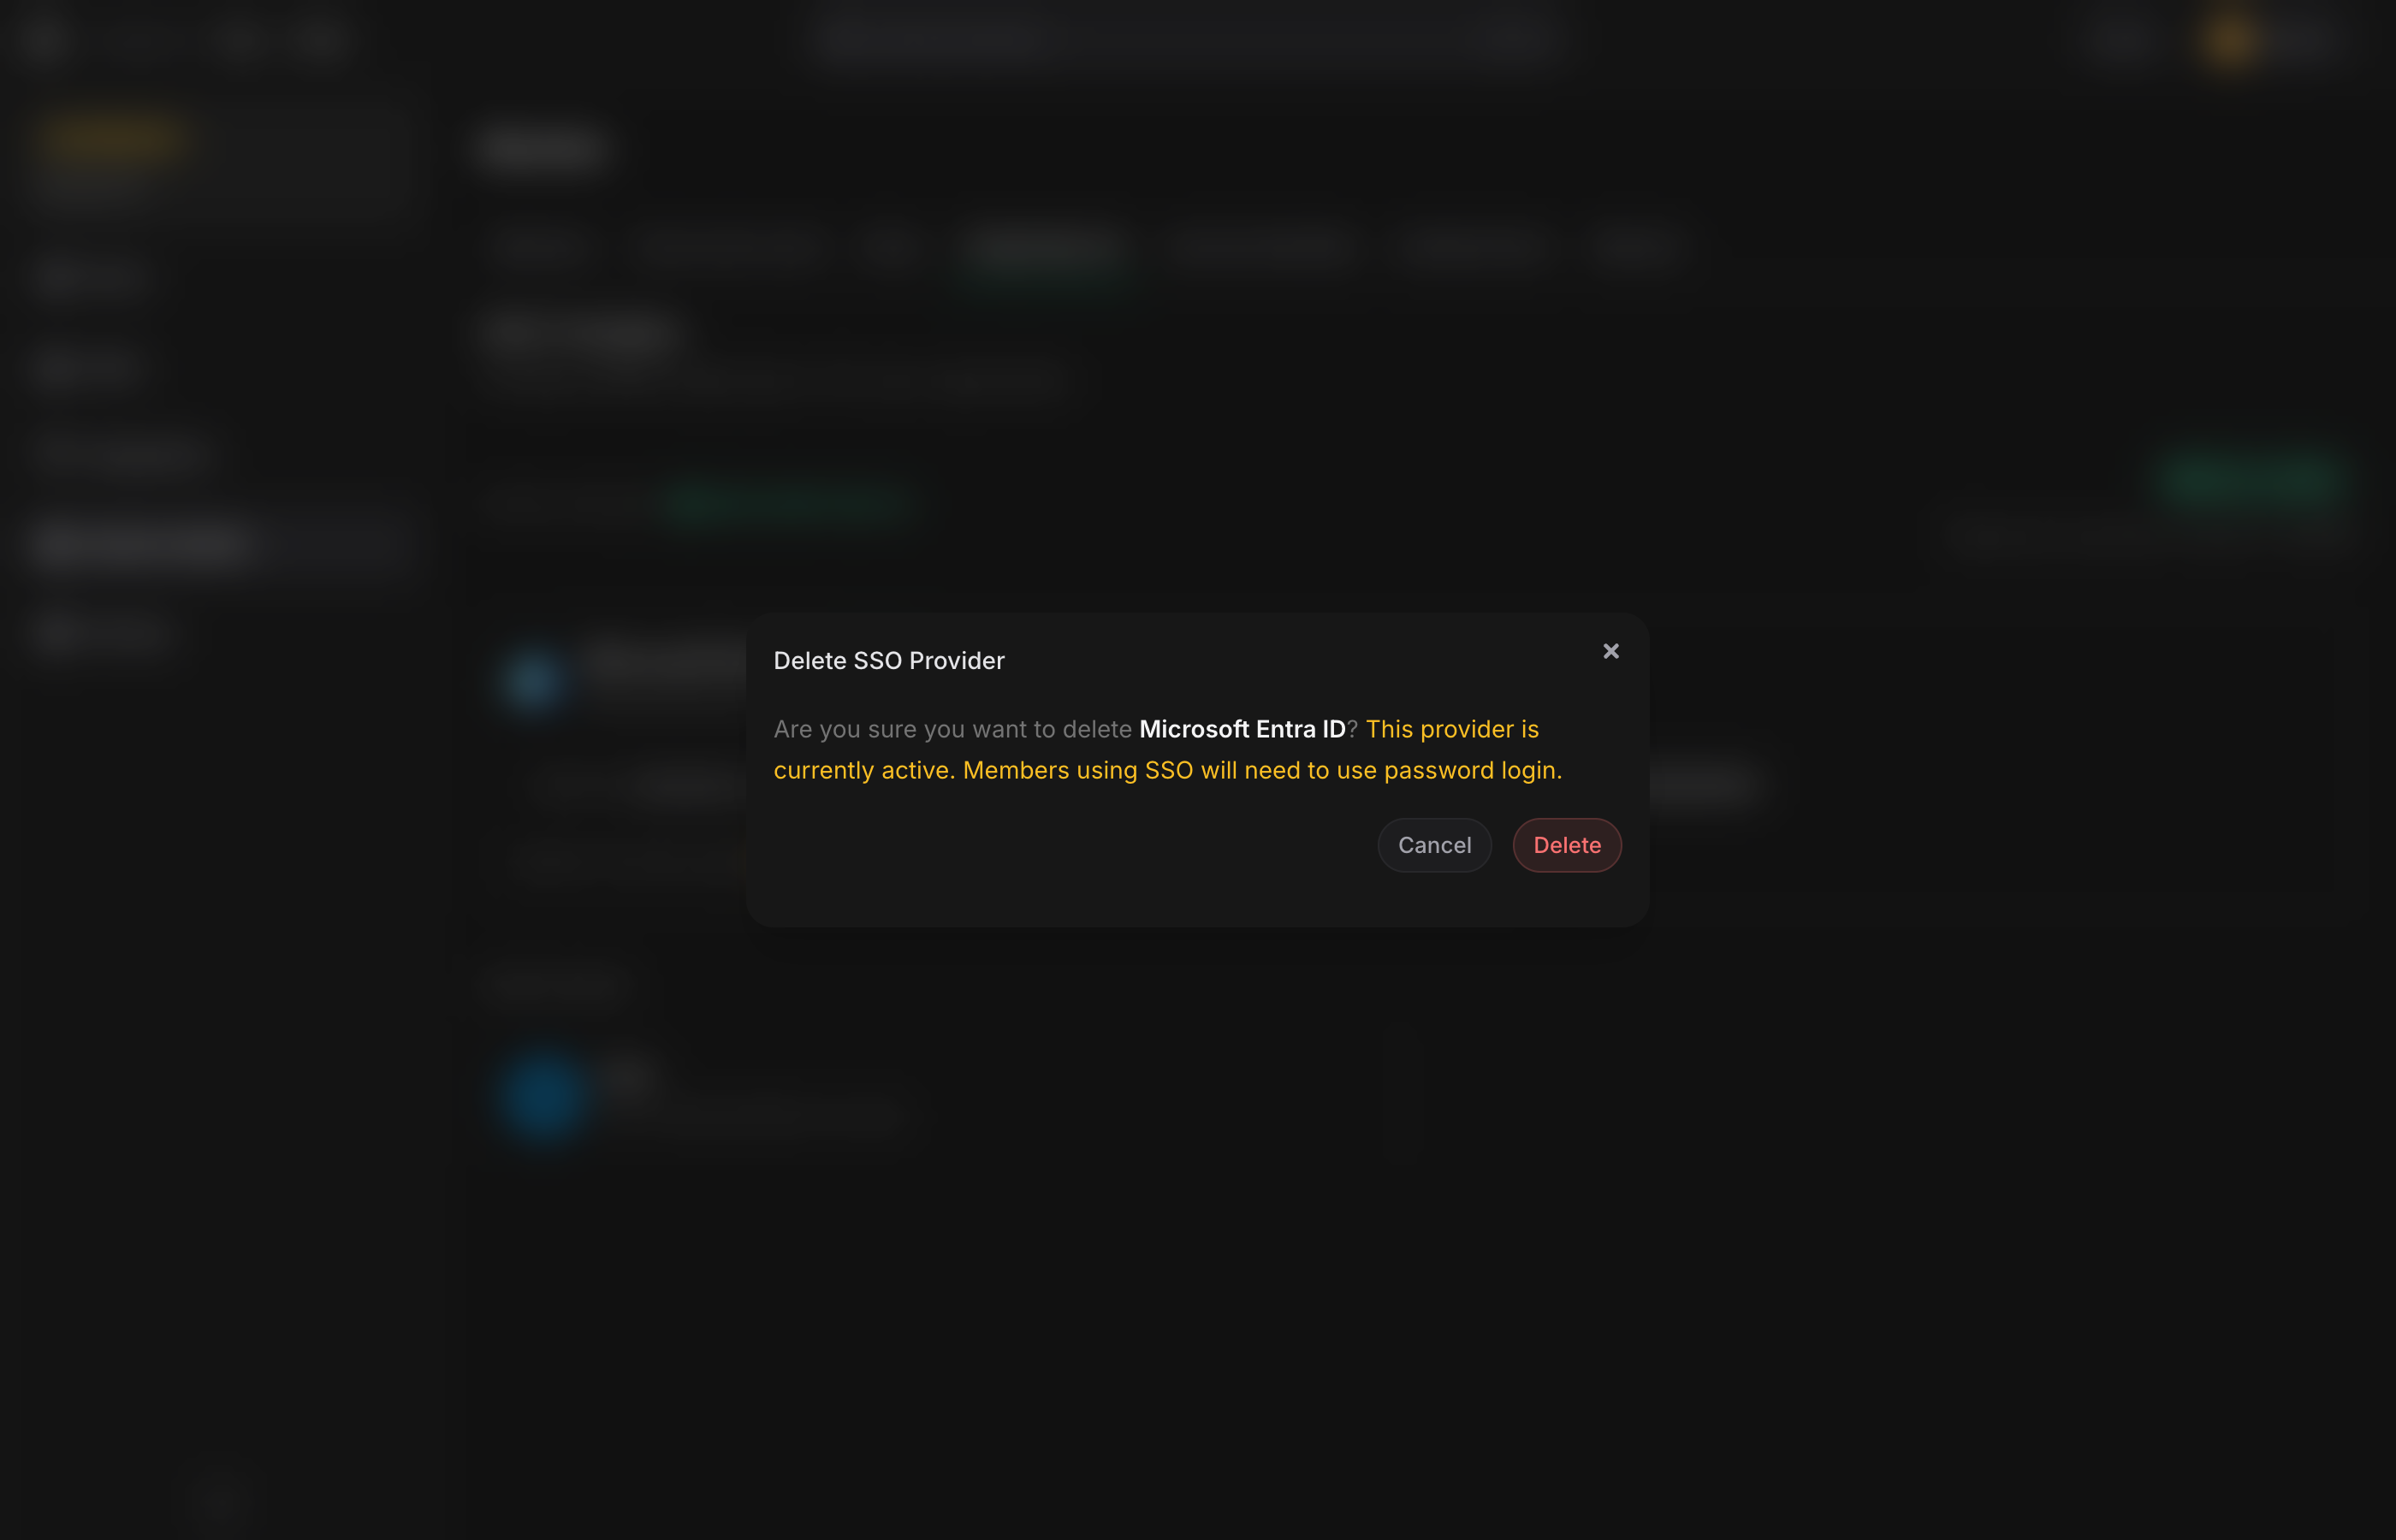
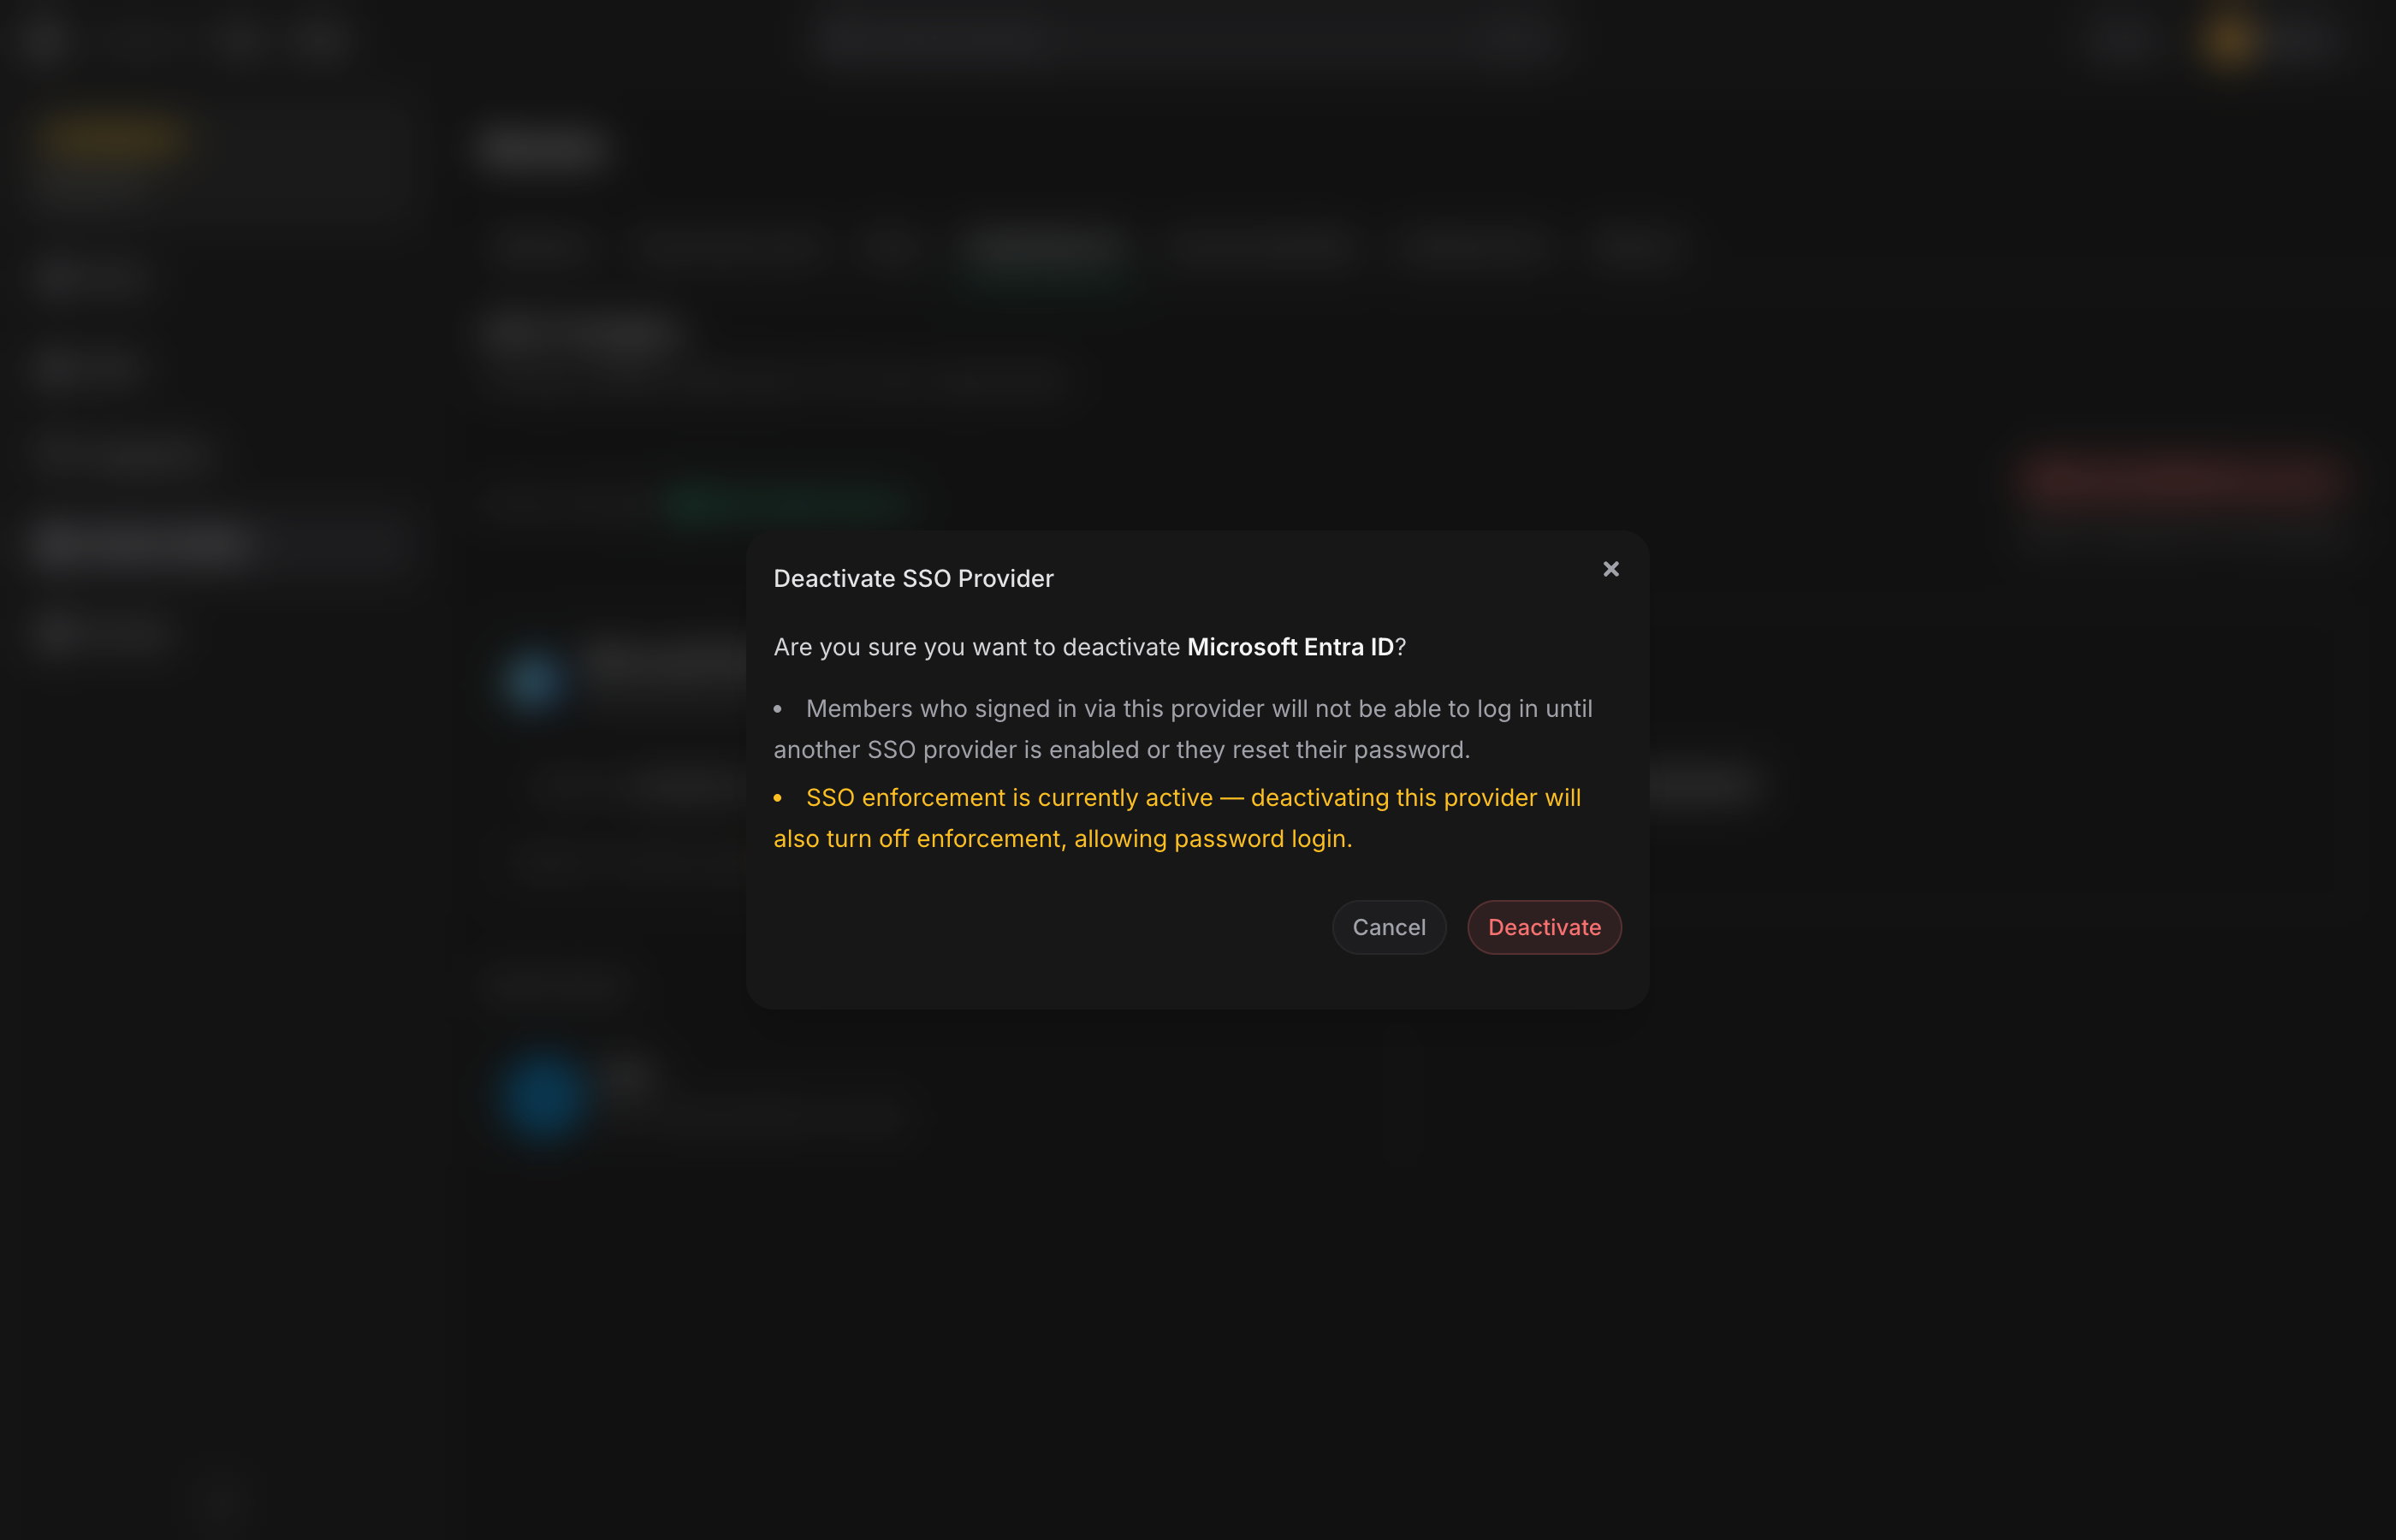
If you deactivate or delete the only active SSO provider while enforcement is on, Phase automatically turns enforcement off. This prevents a scenario where no provider is available to authenticate through and the organisation becomes unreachable.
Self-hosted operators with shell access to the backend container can also toggle SSO state out-of-band — see SSO Enforcement Recovery.
Edit, deactivate, or delete a provider
Hover the provider card to reveal the action buttons:
-
Edit — update the display name, tenant / issuer / client ID, or rotate the client secret. Leaving the secret field blank keeps the existing value.
-
Deactivate — turns off the provider without deleting it. If enforcement is on, deactivating also turns enforcement off to avoid locking the organisation out.
-
Delete — removes the provider. If the provider was active and enforcement was on, enforcement is turned off automatically.